Coffee Filter Ladybug Craft for Kids: How to Make & Enjoy
This post may contain affiliate links. Please read my disclosure statement. Thanks for visiting!


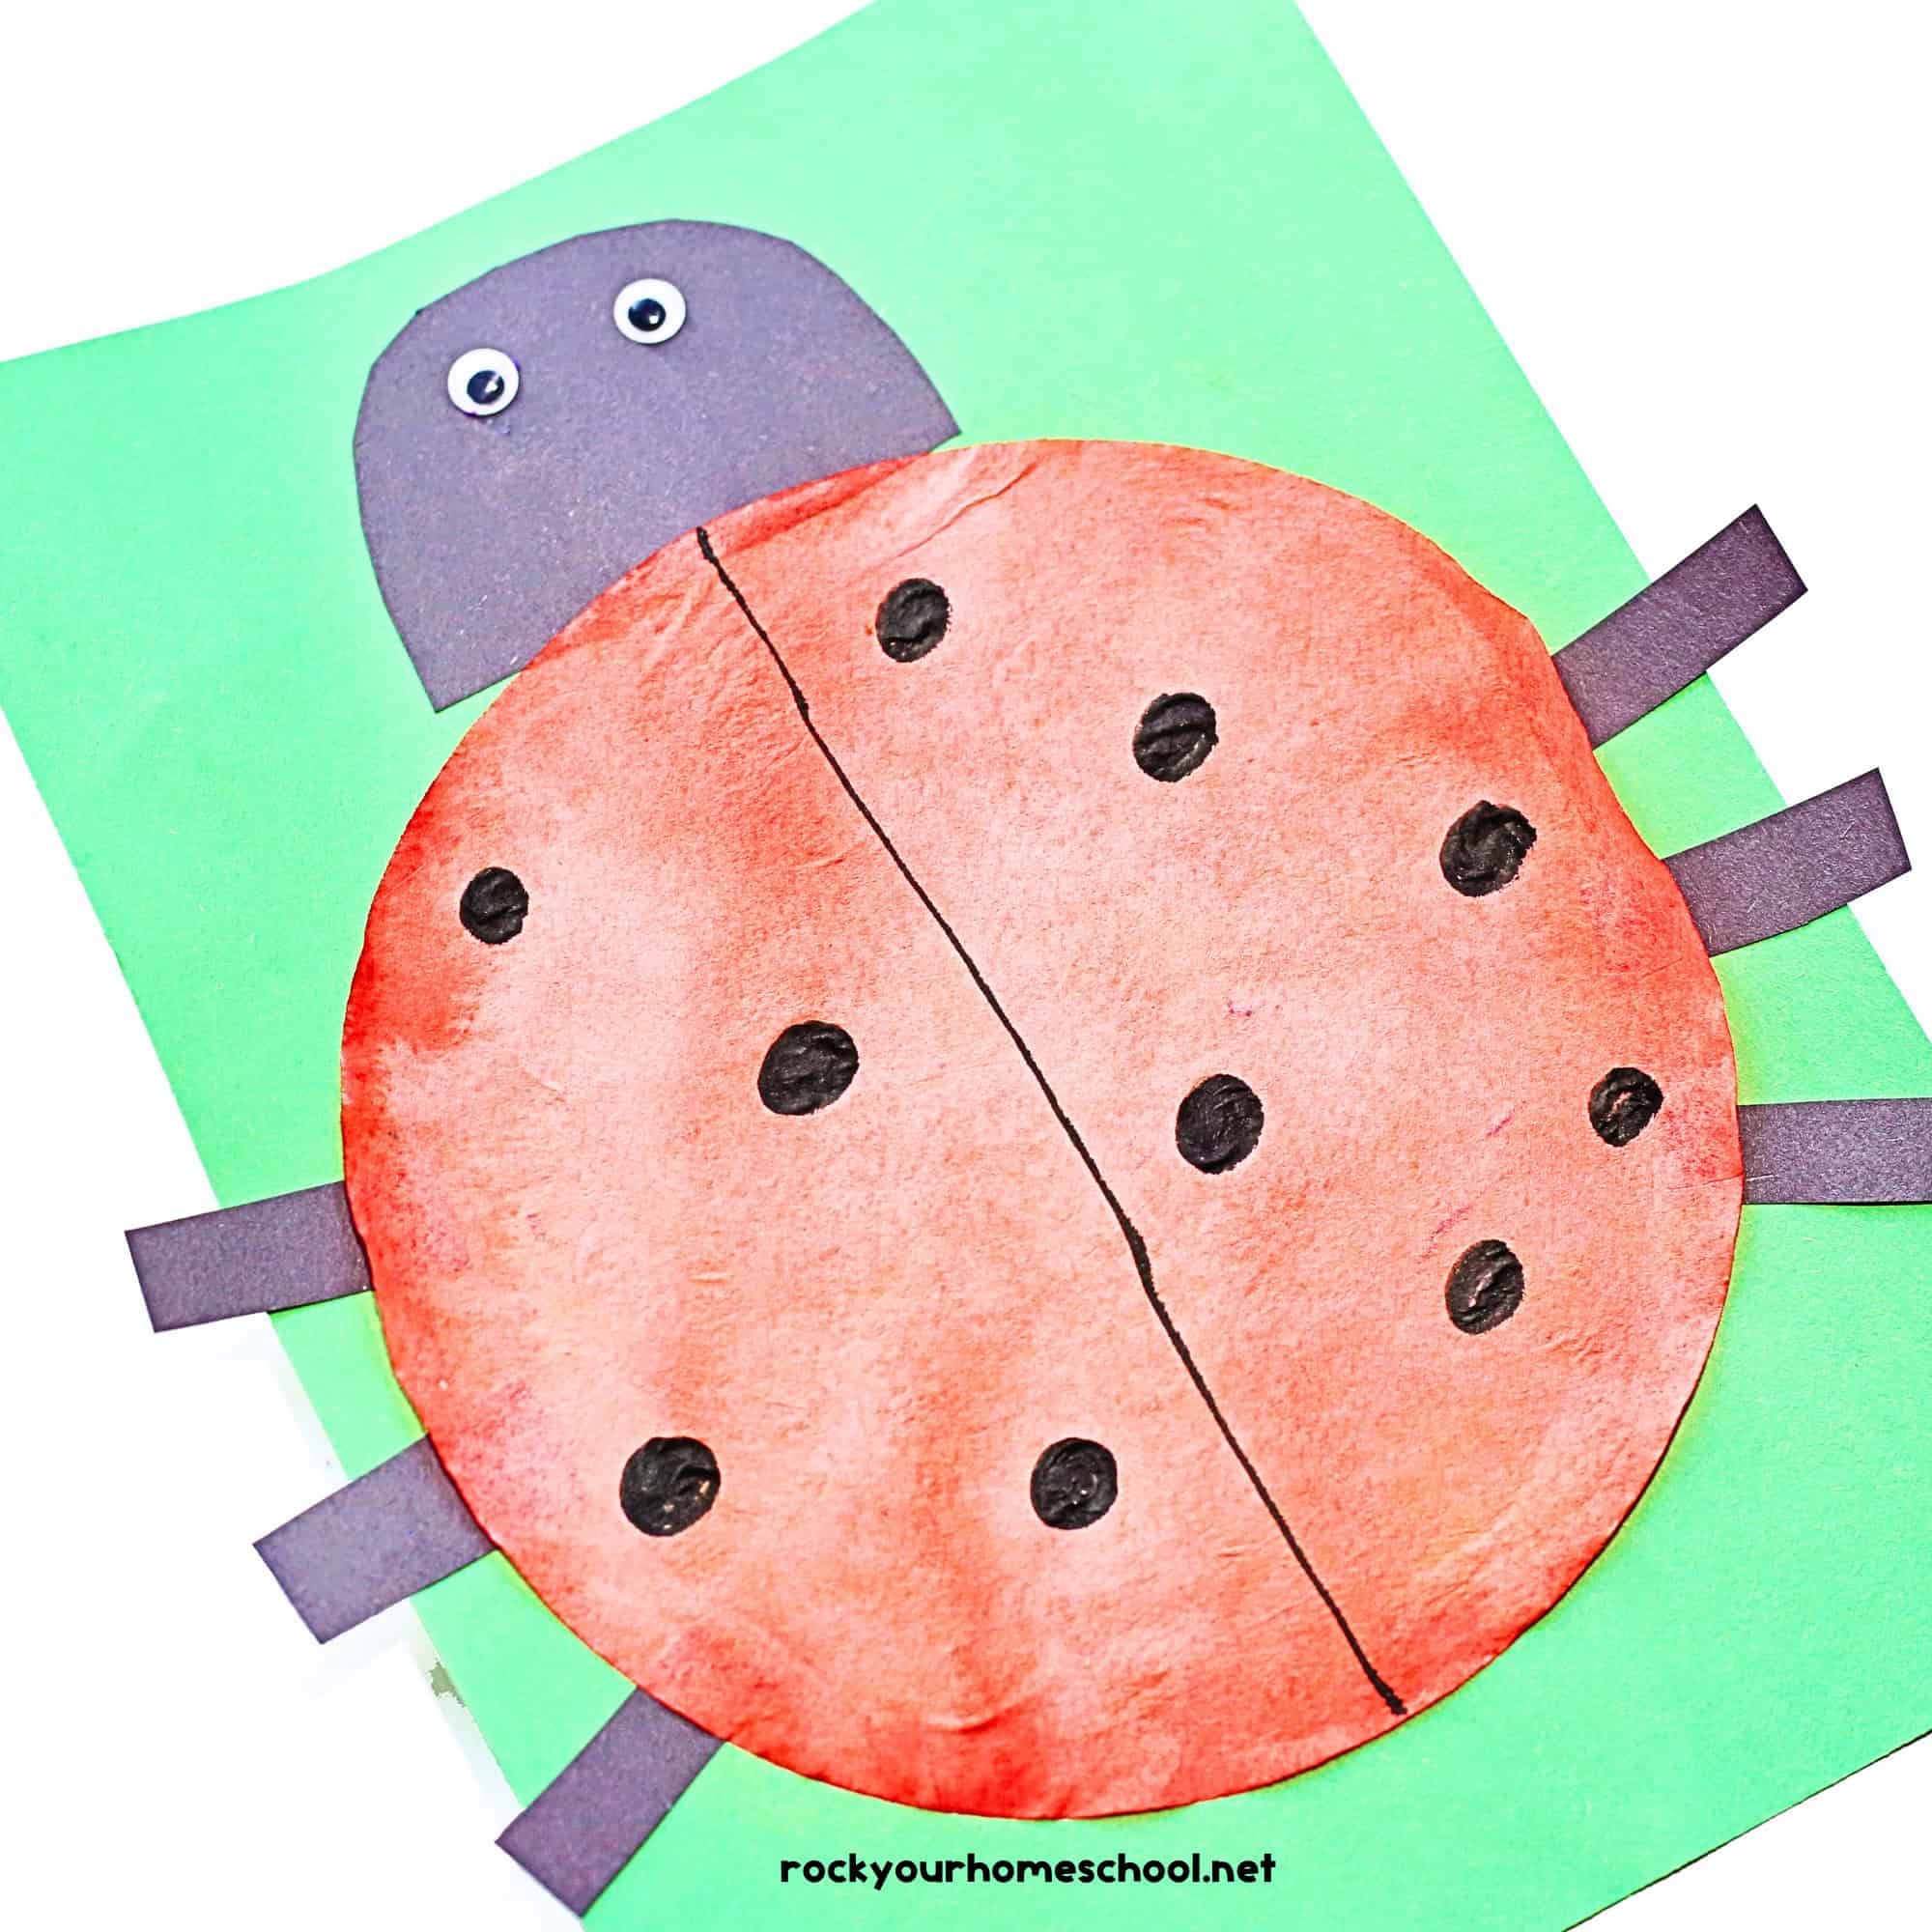
This easy coffee filter ladybug craft for kids is a fun and frugal activity for spring, summer, and more.
With just a few simple supplies, you'll be able to make a lovely ladybug that can brighten up a rainy day or help you celebrate the season. Plus, you can tweak this project to enjoy it with all ages.
I used this easy-to-set up craft with my boys when they were younger and now I'm sharing my experiences with you. Get my tips and creative ideas for using this coffee filter craft as part of your learning fun.
Related: Enjoy another colorful activity with this coffee filter butterfly craft!
Simple and Frugal Project Your Kids Will Love
Are you working on plans for a ladybug-themed party or lesson? Maybe you want to celebrate the season (spring or summer) and need a budget-friendly activity for children? Perhaps you're like me and like to freshen up your collection of screen-free activities for kids?
Well, this cute coffee filter ladybug craft is an incredible idea for all of those things!
Read-aloud time has always been a priority for our family. In fact, I started filling our bookshelves with children's books before my oldest was born. I wanted to make sure to share my favorite books from my childhood, as well as add new ones.
I remember finding Ten Little Ladybugs at a store and smiling with delight. I adored The Grouchy Ladybug by Eric Carle (and had my original on our shelves) and thought this hands-on book would pair well with it for a fun ladybug theme.
When my boys were little, I loved extending the fun with this coffee filter ladybug craft! 🐞
Recommended Materials for This Ladybug Craft
If you need a super simple activity that only uses a few supplies, you'll want to add this to your craft list! To get started, the basic materials that you'll need are:
- Coffee Filter
- Red and Black Washable Markers
- Green and Black Construction Paper
- Googly Eyes
- Glue
- Scissors
Working with younger kids? You may want to skip the googly eyes and use a marker to add those details. If you'd like a bit of sparkle effect, consider using glitter glue!

How to Make This Coffee Filter Ladybug Craft
My #1 tip is to gather all of your materials prior to starting this activity. That way, you won't have to dash off to search for a missing item!
Use red marker to color coffee filter.
Color the entire coffee filter red. Aim to get all of it basically covered, but feel free to leave bits of white space. Leaving some spaces will make it look more interesting once it’s been sprayed.

Use spray bottle to spray water on coffee filter.
Spray the colored coffee filter with water. This step is best to do outside or on cardboard. Allow time to dry.

Make the head and legs.
While the body is drying, cut out 6 slightly long rectangles (for legs) from the black construction paper. Also cut a semi-circle (for the head) that is smaller than the coffee filter.

Add legs and head.
Once it is dried, glue the legs to the back of the coffee filter, three on each side. Glue the body and legs on the green paper.

Add the ladybug head.
Glue the ladybug head behind the coffee filter to the green construction paper.

Add googly eyes and use marker to add details.
Glue the googly eyes towards the top of the head. Draw a line down the shell with the black marker. Also, use the marker to draw and color in circles scattered around the shell for the ladybug’s spots. Apply gentle pressure with the marker to avoid ripping the coffee filter.

Frequently Asked Questions About This Ladybug Craft
This craft is great for kids of all ages. Younger children (ages 2-4) might need help with some parts, like cutting the construction paper. Older kids (ages 5+) can take on more of the craft independently and get more creative with their designs.
For younger children, you can pre-cut the ladybug wings and body from construction paper, letting them focus on coloring and assembling. Older kids can cut out the parts themselves. You can also encourage older students to add extra details.
No worries! If you don’t have coffee filters, you can try using white tissue paper or even a paper towel. Just make sure that whatever you use can be colored with markers. Also, you may need to be more gentle when handling them since they can tear easily.

Creative Ideas for Using Your Colorful Ladybug
Need some ideas and inspiration for how to enjoy your ladybug crafts? Here are some simple ways to display and use for learning:
- Use to decorate your homeschool space
- Turn your ladybugs into greeting cards
- Make a ladybug-themed bulletin board
- Incorporate them into a fun science lesson about ladybugs (like the life cycle of a ladybug)
- Boost math time by counting and adding the dots
- Make several ladybugs and have a family - try different sizes of coffee filters (you can cut them down) and designs
- Have a ladybug-inspired party or poetry teatime
Cool Ways to Enjoy Ladybug (and More) Fun
This coffee filter ladybug craft is just the beginning of tons of fun with kids. You can try my other coffee filter crafts (with more to come!), like:
- Earth (perfect for Earth Day)
- Butterfly
- Spring wreath
- Rainbow
- Shamrock
- Jingle bell
And I highly encourage you to read some ladybug books, like some of our top picks:
The Life Cycle of a Ladybug (Blastoff! Readers: Life Cycles) (Life Cycles: Blastoff! Readers, Level 3)It's a Good Thing There Are Ladybugs (Rookie Read-About Science: It's a Good Thing...)Bendon Ten Little Ladybugs Piggy Toes Press StorybookThe Grouchy LadybugAre You A Ladybug? (Avenues) (Backyard Books)Life Cycle of a Ladybug (Pogo Books: Incredible Animal Life Cycles)


⭐ How will you use this coffee filter ladybug craft with your students? I'd love to hear your ideas. And please let me know if you have any questions about the steps or ideas that I shared!