Looking for a budget-friendly and easy craft that will brighten your day? This torn paper rainbow craft is an awesome choice!
Using just a few supplies (construction paper, glue, and cotton balls), your kids can create a colorful masterpiece. This project is delightful for teaching about rainbows and weather. You can use it to celebrate spring or enjoy for rainy day fun. Plus, it’s a fun way for kids to practice fine motor skills as they tear the paper and arrange their rainbow.
I’m sharing my tips and ideas for doing this rainbow craft for kids, as well as step-by-step instructions. This activity has been a joy to do with my boys and I hope your kids (and you) love it, too!

Frugal and Easy Project for Kids to Have Colorful Fun
If you’re planning and preparing for a rainbow-themed lesson or party, I encourage you to add this craft for kids to your list. It’s a simple project that’s easy to organize, do, and clean up. Plus, you can really make it work for any time of year!
Torn paper projects are some of my top picks for easy and affordable kids’ crafts. So, it’s really no surprise how popular our torn paper snowflake, Cat in the Hat, flower, and Easter egg crafts have been. These types of crafts turn into such cute creations and help students build fine motor skills.
From the perspective of a mom of a large homeschool family, I’ve appreciated how these crafts are:
- Adaptable it for all ages – from toddler through teen
- Only use a few materials
- Can be adapted for different holidays, seasons, and events
- Are easy to customize with different colors, templates, and supplies
And that’s why I think these projects also work so well for homeschool co-op classes, classrooms, and libraries. I recreated this torn paper rainbow craft and I’m so excited to share it with you!
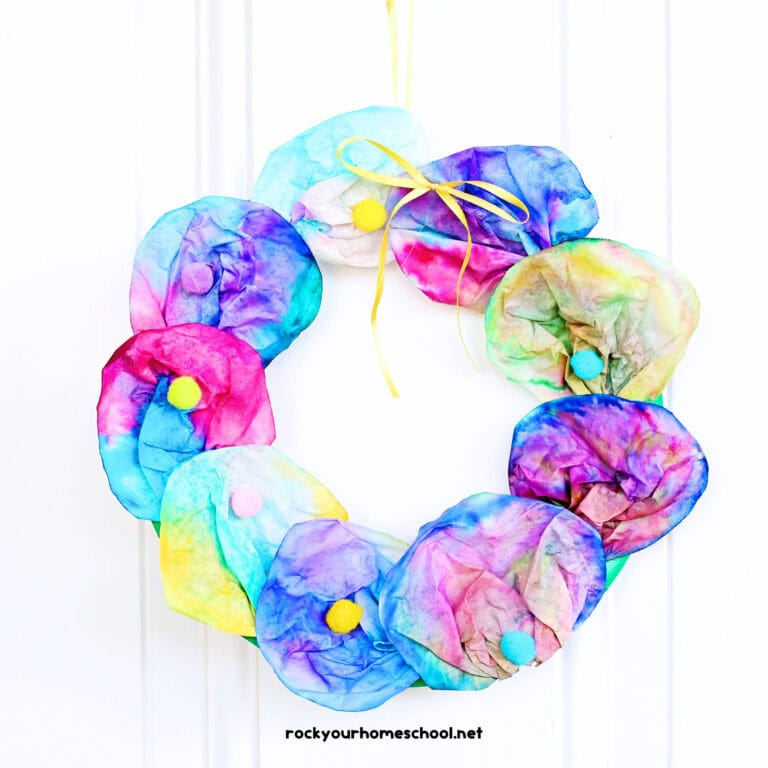
Related: Try this beautiful coffee filter rainbow craft, too!
Recommended Materials for This Rainbow Craft
To keep this craft simple and have the end results look like the example shown in this tutorial, you only needs a few supplies:
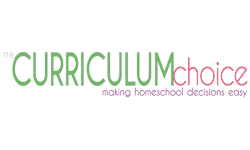
- Construction paper (red, orange, yellow, green, blue, purple, light blue)
- Glue stick
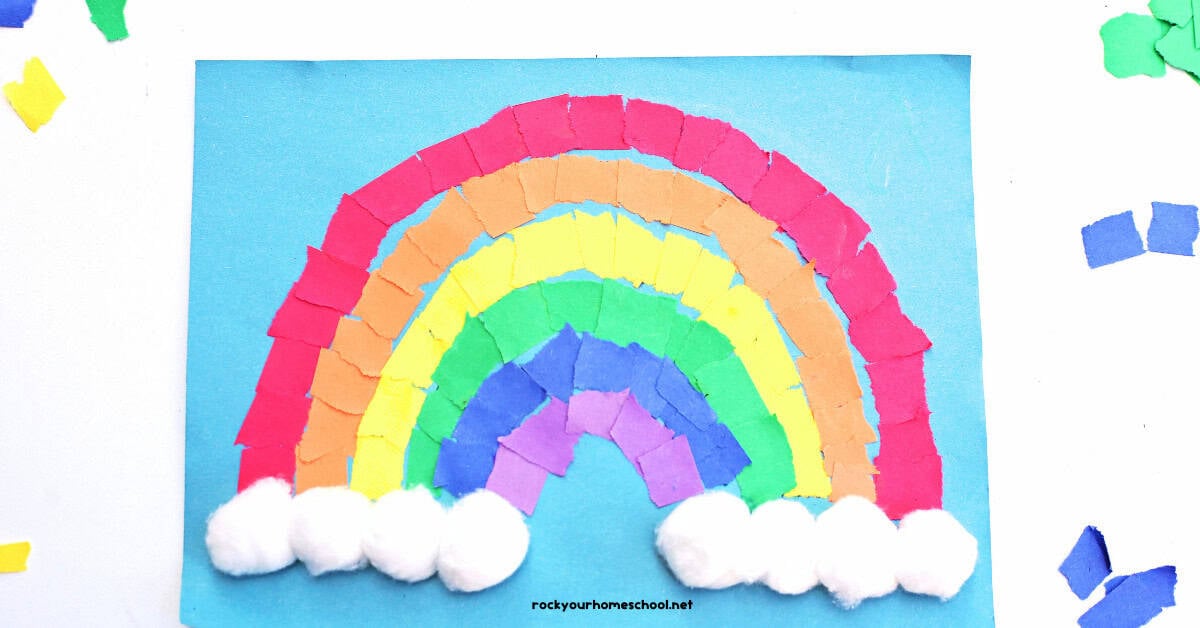
- Cotton balls
If you want to have a sturdier background for your rainbow, you can use cardstock (white or other color).
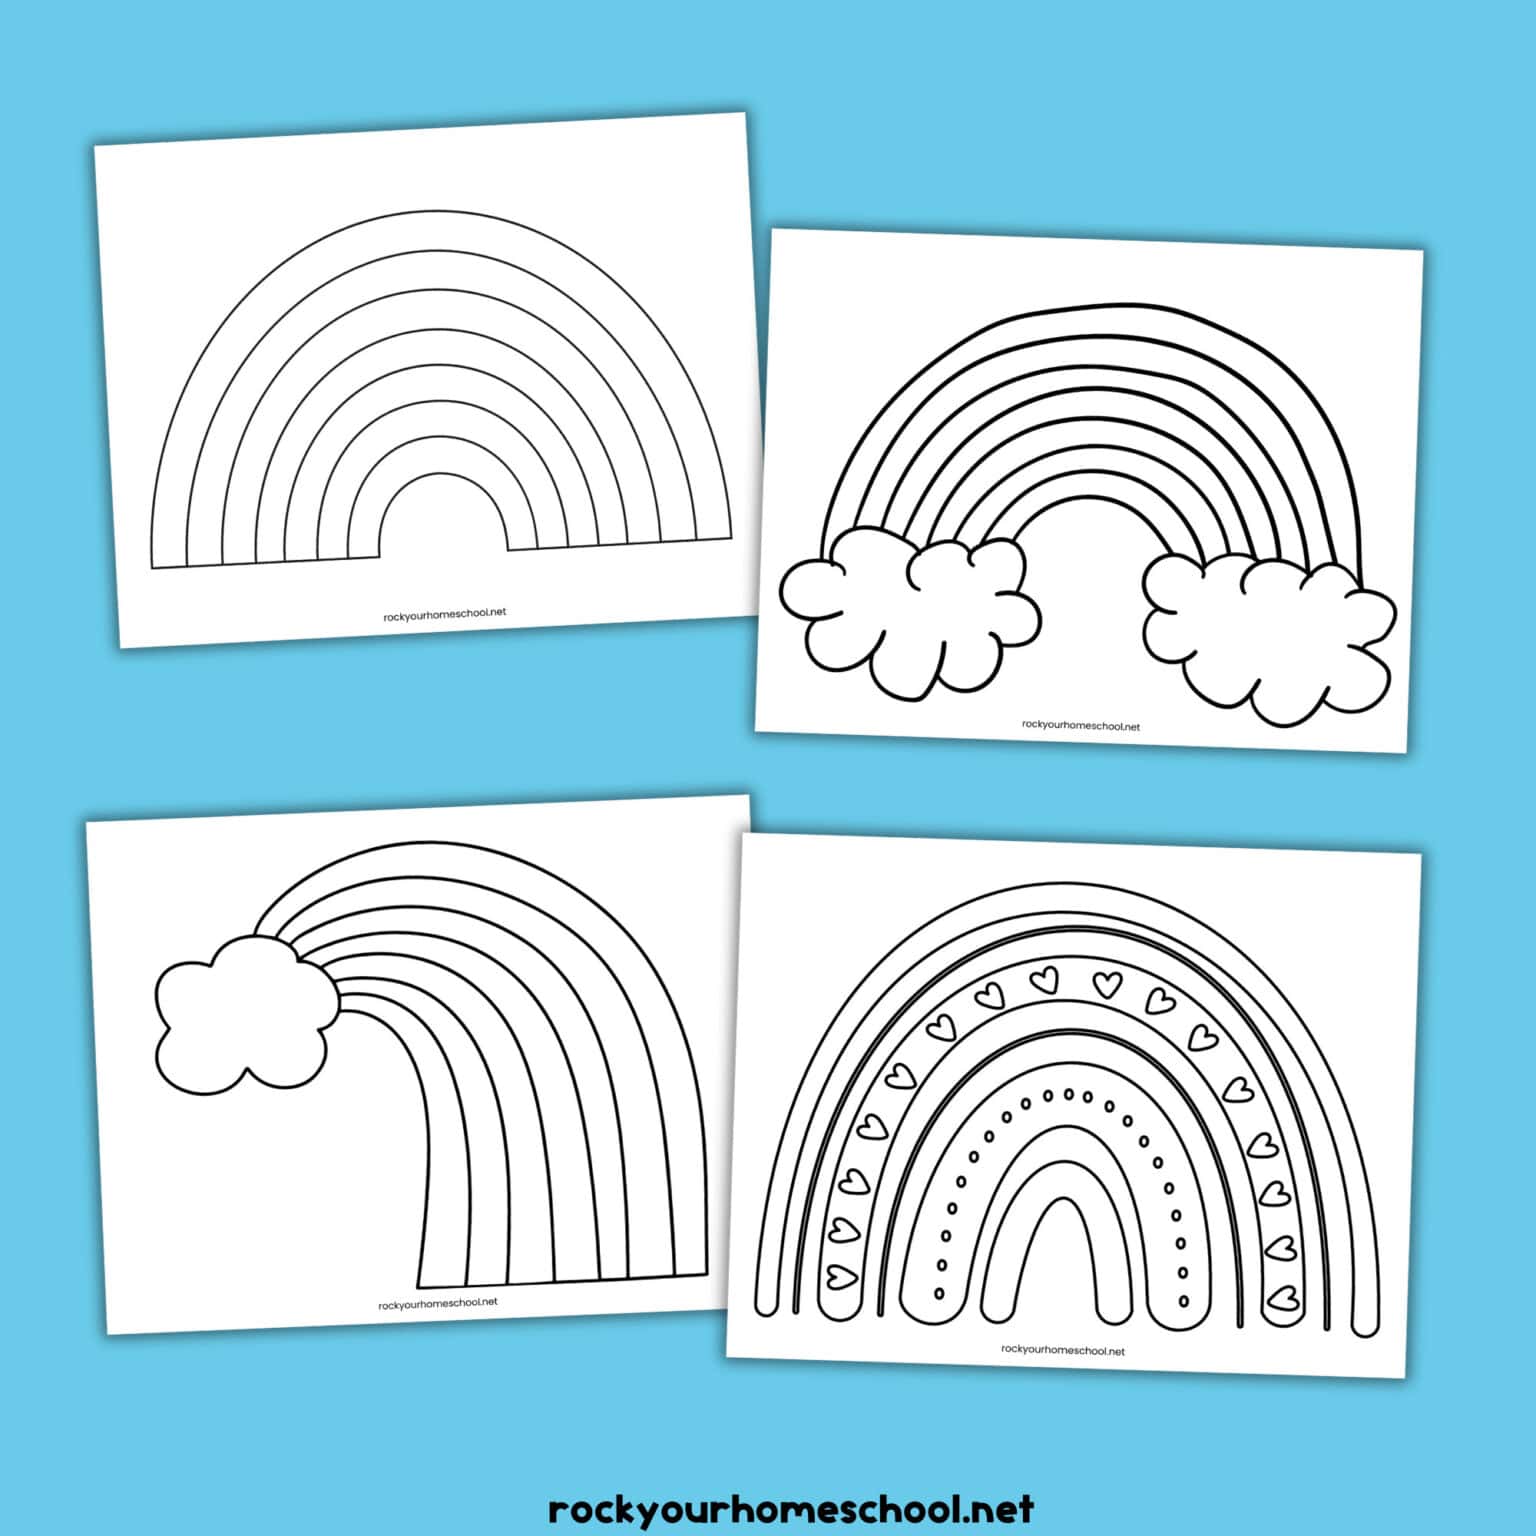
I have free printable rainbow templates (learn how to get at the bottom of this post) that you can use to make this project print-and-go. This option is nice if you don’t have a lot of time or working with a large group and don’t want to draw a bunch of rainbow outlines.

Step-by-Step Instructions to Make This Paper Rainbow Craft
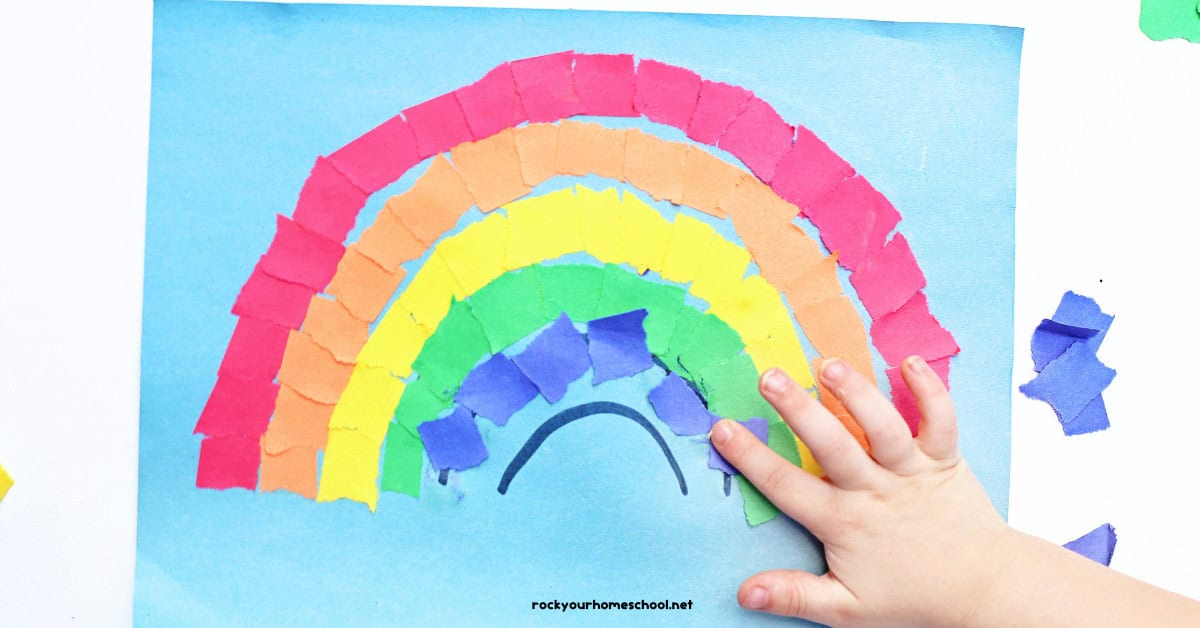
Prepare the paper.
Take your construction paper in rainbow colors and tear it into small pieces. The torn edges add a fun texture!
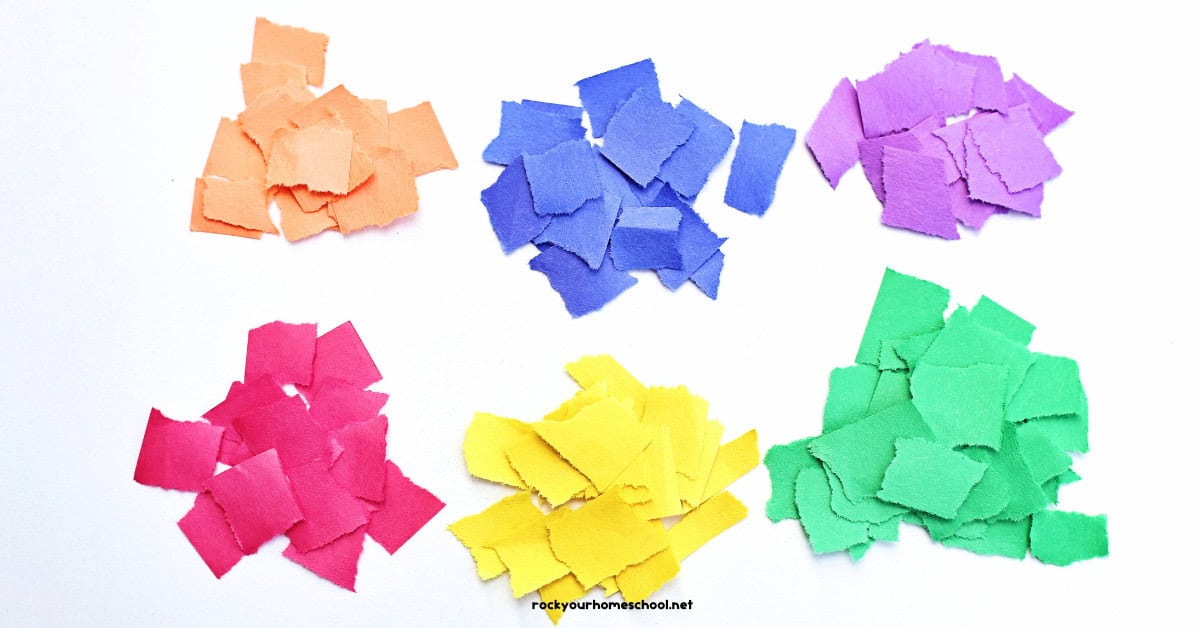
Prepare the rainbow shape.
On a sheet of light blue construction paper, sketch a rainbow outline with six curved bands. OR use our free printable rainbow templates – learn how to get at bottom of this post!
Build your rainbow.
Using a glue stick, apply glue to one section of the rainbow at a time and press the torn pieces onto the corresponding color bands.
Frequently Asked Questions About This Torn Paper Rainbow Craft
This craft is perfect for children of all ages, especially preschool and elementary-aged kids. Younger children may need more help with tearing the paper and placing in the correct rainbow order (ROYGBIV). Older kids can independently complete the project and add details.
Yes, you can use any type of paper you have on hand. Construction paper is ideal, but you could also use scrap paper, tissue paper, or even magazine pages to make your rainbow more textured or colorful.
Tips for Making and Using Your DIY Rainbow
Customize your paper rainbows with a bit of outside the box thinking. Use different materials, like tissue paper (regular or glitter) or felt. You can also try pom poms or sequins for terrific textures and 3D effects.
Add details to the background of your rainbow, like a sun, small birds, or additional clouds. Pencils, color pencils, tempera paint sticks (like Kwik Stix) and markers are amazing for putting extra touches on your project.
Talk with your students about how you can display their work. Hang the rainbows on a wall, cabinet, or bulletin board. For a cool look, place your torn paper rainbow craft in a frame!
Pair this project with more rainbow-themed activities, like this adorable rainbow paper craft.
Get Your Free Printable Rainbow Templates for This Craft
This rainbow craft can be even easier by using these free printable templates. This pack contains 4 pages with black-and-white rainbow outlines. These templates can be used for this project, coloring, or other creative activity.
Print as many of these rainbow templates as you need to use with your students at home, in the classroom, and at the library. Please share this post if you know others who like to do frugal crafts with kids!
To get this printable template pack, simply subscribe (for free) to Rock Your Homeschool.
⭐️ An email will be sent to your inbox with the PDF file plus a password to open the VIP Resource Library to all RYHS freebies. Please email Amy at rockyourhomeschool@gmail.com if you have any issues!
You’ll also be added to our email list and receive emails with ideas, resources, and encouragement to make life and learning fun.
(If you are a VIP member of Rock Your Homeschool, simply go to the VIP Resource Library and enter the password in your welcome email.)
⭐ Get your set of free printable rainbow templates! ⭐
🌈 What are your ideas for making and using this torn paper rainbow craft with kids? Please share (and if you have any questions) in the comment section at the bottom of this post!