Looking for a deliciously fun hands-on activity that’s mess-free, budget-friendly, and packed with creativity? These DIY felt cookies are just the treat!
Whether you’re planning a playful afternoon, looking for a cookie-themed craft, or adding a sweet touch to your Letter C activities, this project is a perfect fit. This simple felt craft is amazing for summer fun, learning centers, DIY pretend kitchens, and more. Plus, you can customize them to fit a holiday, season, special event, or just because.
I’m sharing my tips and ideas for enjoying this activity with your children. Your kids will have a blast making their very own colorful cookies – no baking required!
A Sweet Felt Craft for Kids
One of my favorite things about this felt cookies activity is how it brings such a sweet theme to life in a creative way. It’s simple, frugal, and so easy to customize. Plus, it’s a cool way to help kids build fine motor skills without even realizing it!
I’ve used this craft many times with my boys and it always brings smiles. Sometimes, I would prep everything ahead of time and set it up as a “cookie tray” activity. Other times, I let them jump in and help cut shapes or gather supplies which turns into a fun little project all on its own.
These felt cookies make a perfect quiet time activity. I’ve pulled them out during read-alouds, audiobooks, or while I was working one-on-one with an older sibling. They kept hands busy, minds focused, and screens off so a total win.
At times, the boys would go the traditional route and glue everything down with craft glue. Other times, they’d leave the pieces loose so they could decorate over and over again.
Around the holidays, we’d tweak this project and use seasonal colors. They had a blast creating Christmas cookies or spooky Halloween cookies. You can even get fancy with supplies like pom-poms, buttons, pipe cleaners, lace, or yarn to make your cookie creations pop!
This project is all about flexibility, fun, and connection. I hope it brings just as much joy to your learning adventures as it has to ours.
What You’ll Need for This Felt Cookies Activity
The first thing to know about this craft is that you can use just about any material that you already have – no need to go out and buy anything! Unless you want to enjoy it for a specific holiday or season, make do with the colors and supplies you have.
We have used these materials for our felt cookie decorating:
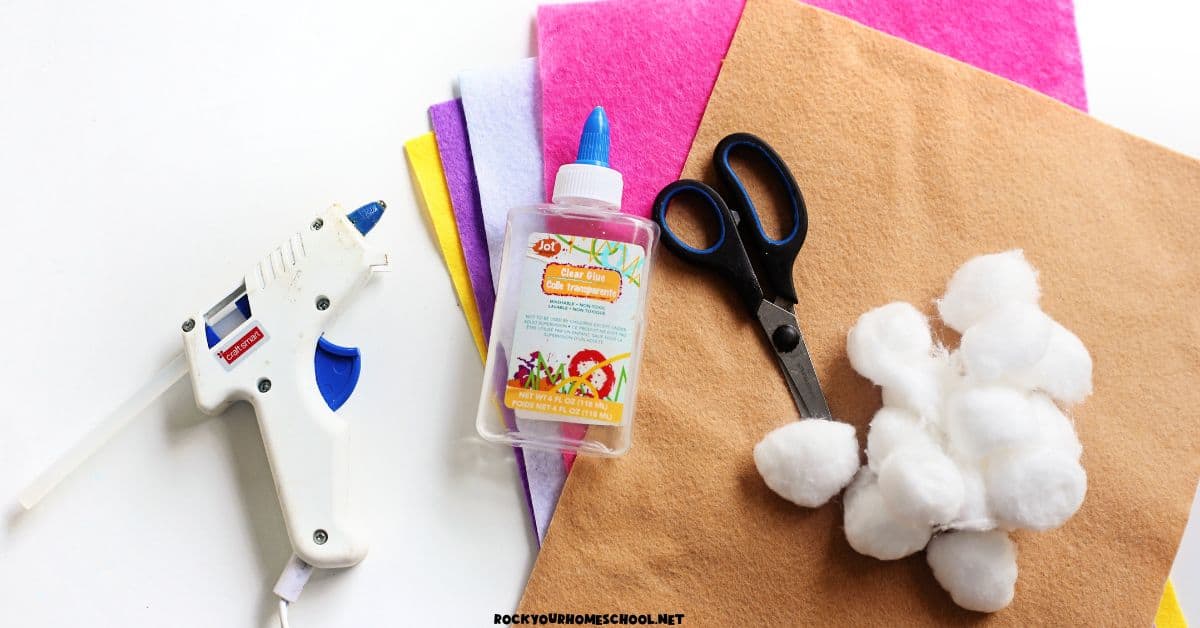
- Light brown felt
- Felt in various colors for frosting and sprinkles
- Kid-friendly glue (craft glue works very well!)
- Scissors
- Cotton balls
- Hot glue gun (adult use only)
- Various craft supplies, like:
- pom poms
- sequins
- lace
- yarn or string
- buttons
- foam shapes
How to Make Your DIY Felt Cookies
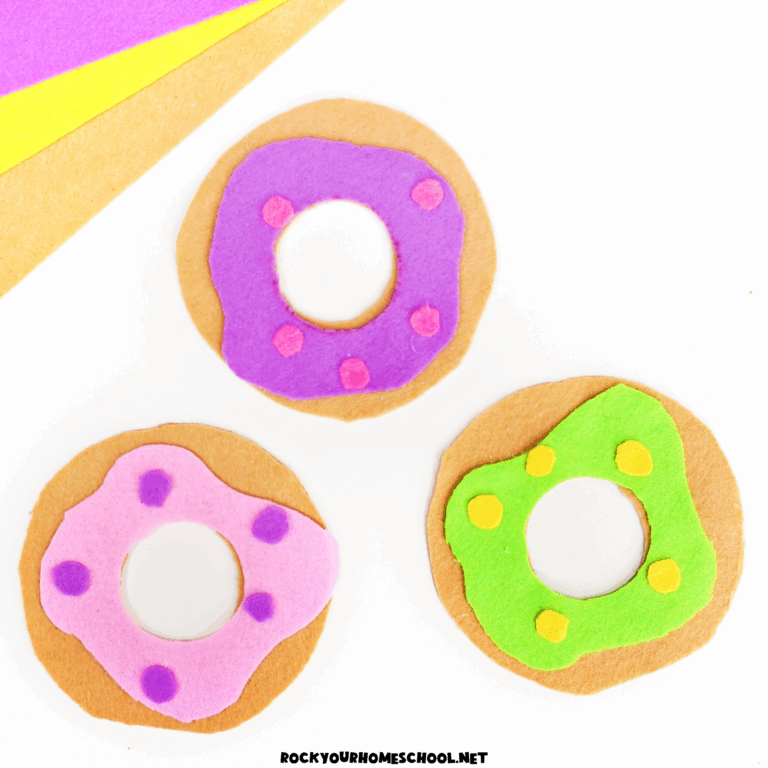
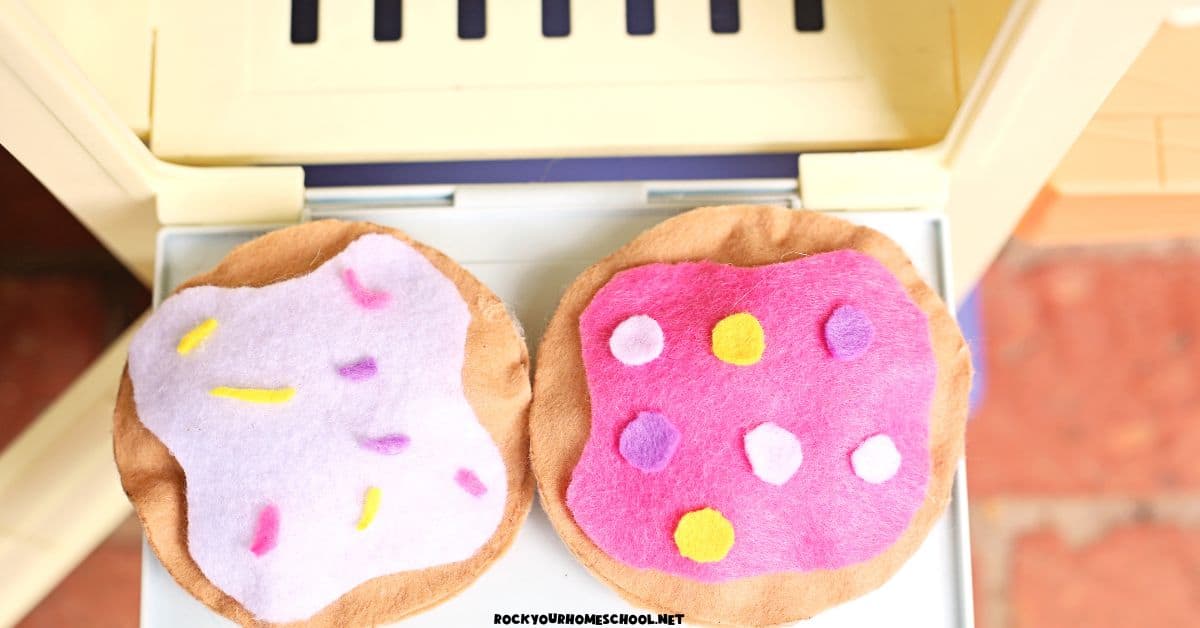
Cut the cookies and make the sprinkles.
Cut light brown felt into medium-sized circles. These circles will be the cookie bases. Then cut tiny sprinkle shapes like thin rectangles and dots.

Make the frosting.
Use colorful felt to cut wavy-edged “frosting” shapes to fit on top of the cookies. Kids can glue the frosting and sprinkles onto the brown cookie circles using kid-friendly glue. Let them dry completely.

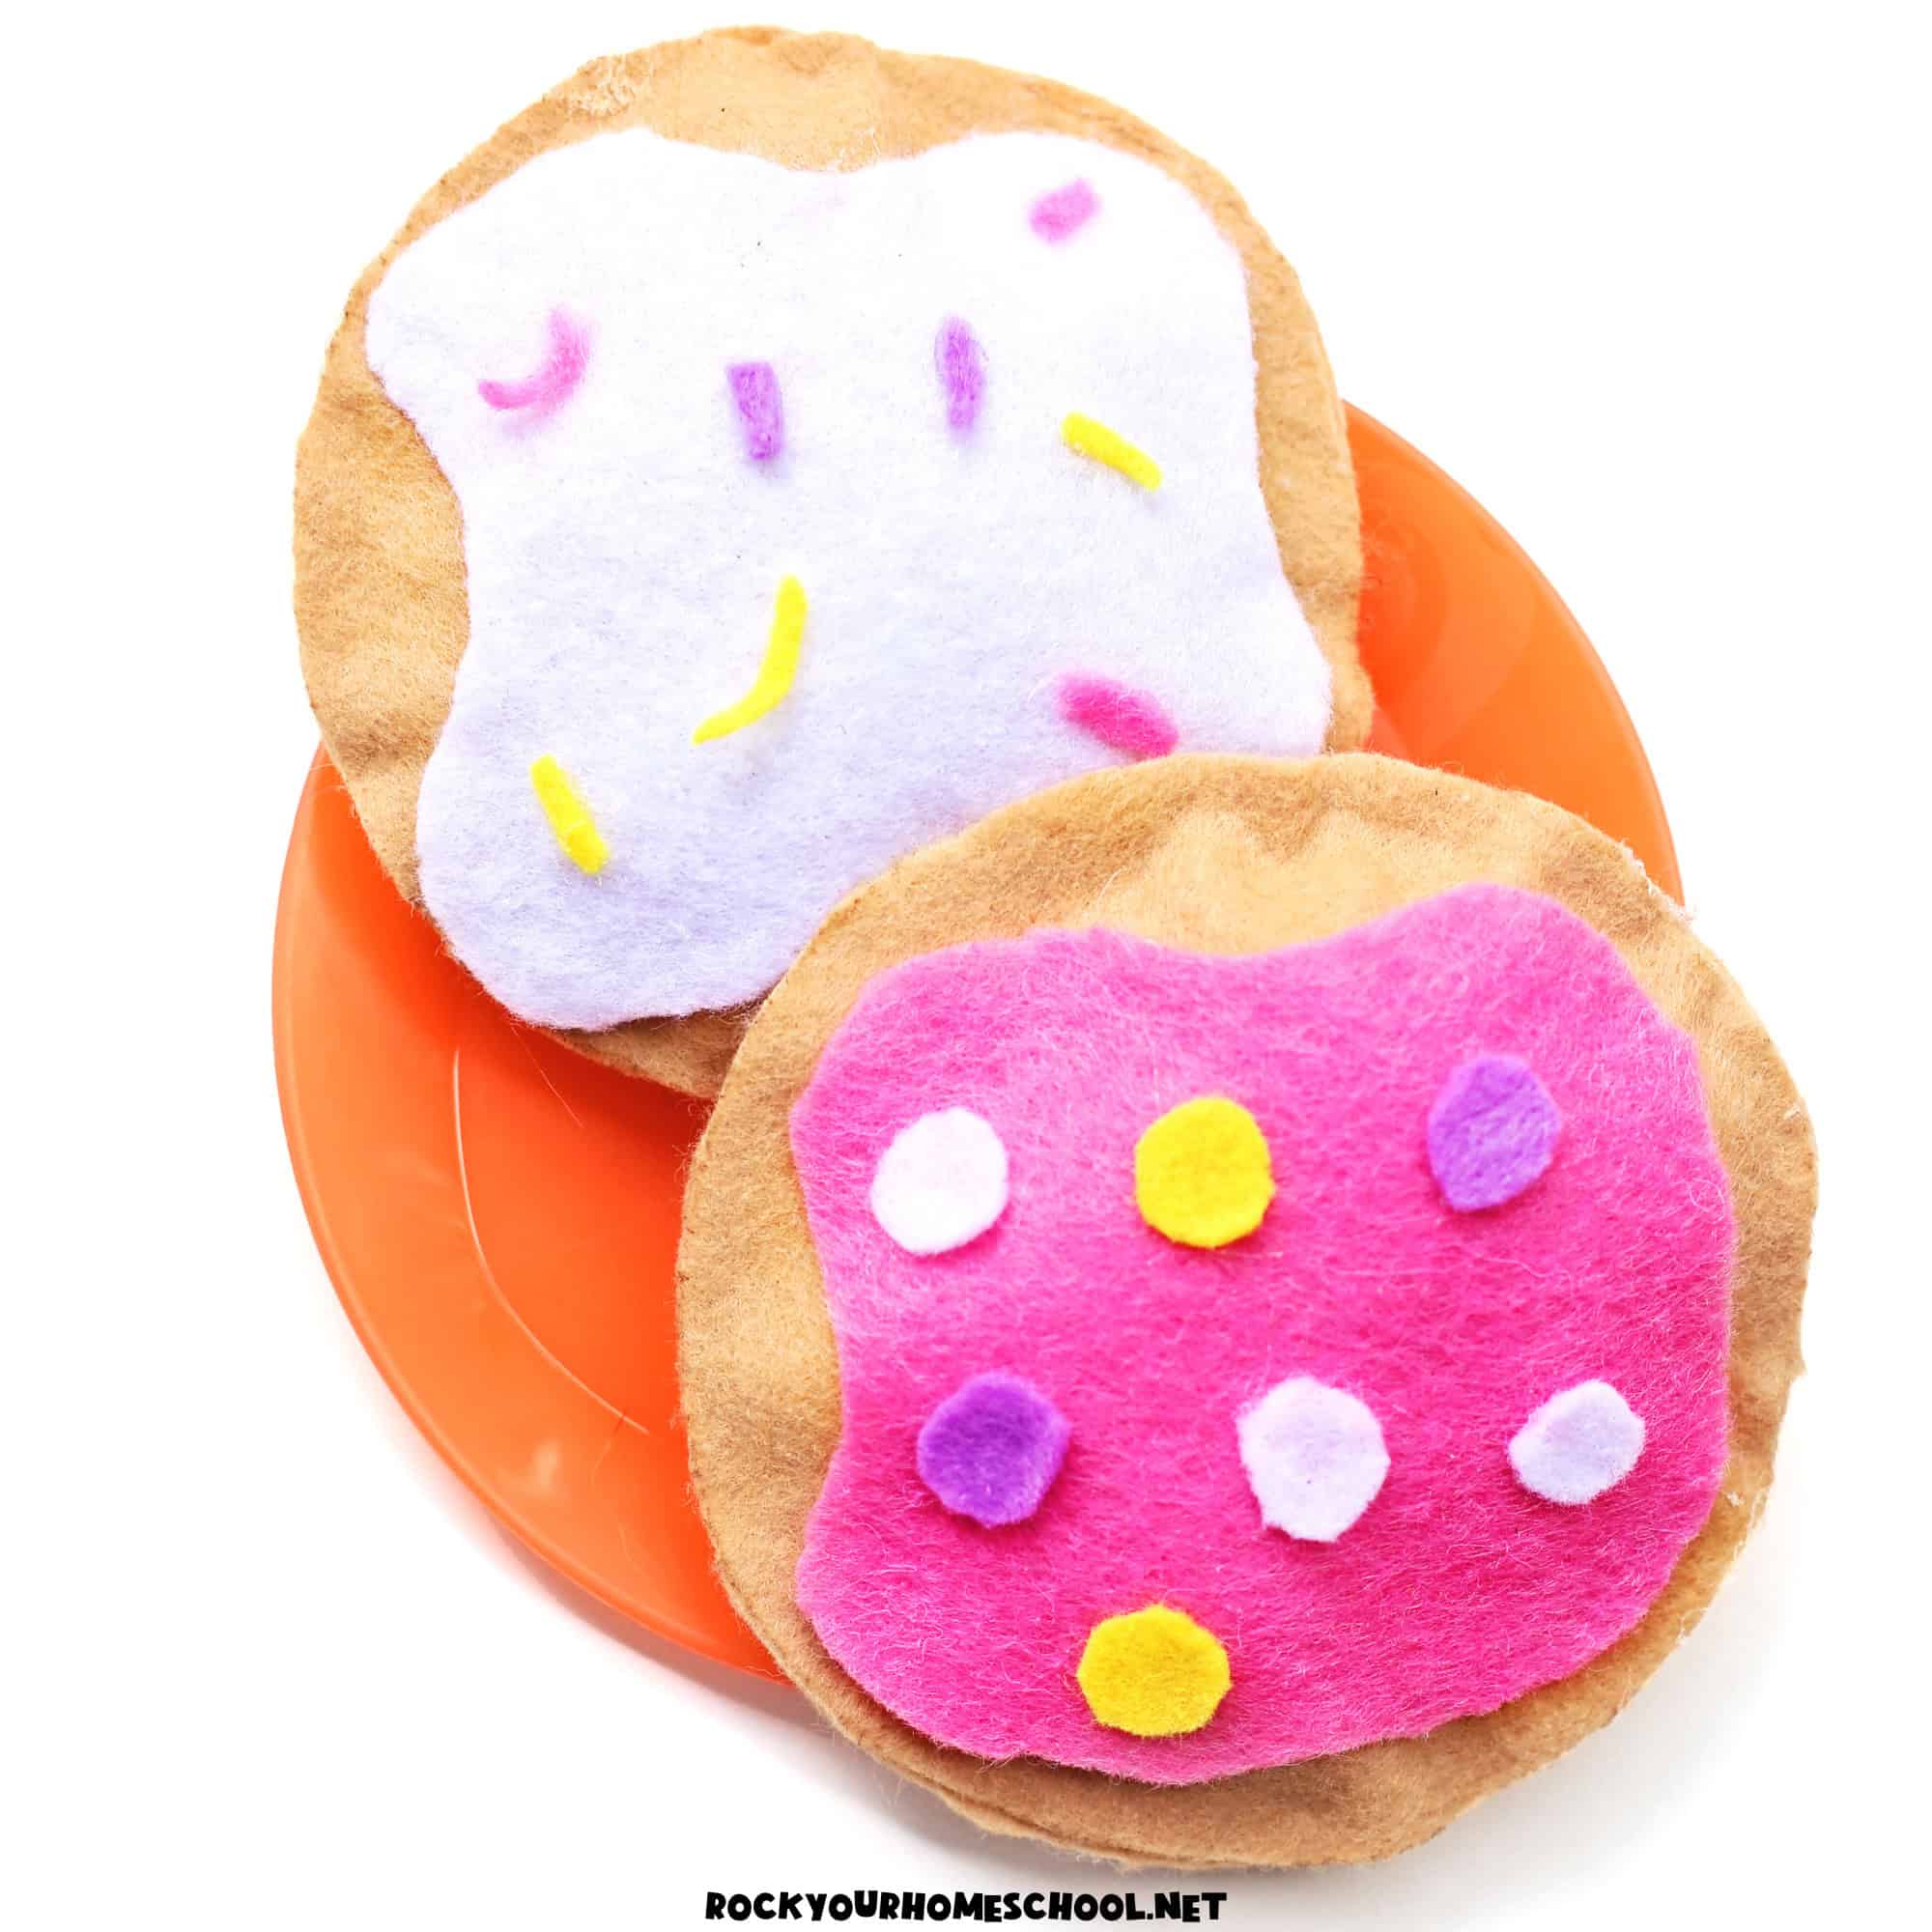
Optional: Make puffy cookies!
If you’d like a 3D effect for your felt cookies, you can add a bit of stuffing and a bottom layer. Once the decorated cookie tops are dry, take a plain brown circle and line the edge with hot glue. Leave about a one-inch gap.
Gently press the decorated top onto the glued edge, aligning the shapes. Once secure, stuff the opening with cotton balls to give the cookie a soft, puffy look.
Hot glue the remaining opening shut.

Creative Ideas & Fun Tips for Using This Felt Cookie Activity
There are really so many ways that you can enjoy your DIY cookie time. I encourage you to chat with your kids about their ideas, too. Here are a few things that my boys liked:
- Cookie Decorating Station: It’s great for playdates or a quiet afternoon craft.
- Play Cookie Shop: Use toy cash register (my boys loved this one because it has a little microphone!), tray, and signs. Add play money and menu. Your children can take cookie orders and deliver their treats!
- Sorting and Patterns: Make cookies in different colors or styles (chocolate chip, frosted, sprinkled, etc.). Sort by color, size, or type. Or challenge your kids to make a pattern using the felt cookies.
- Holiday and Seasonal Themes: Customize your cookies for Christmas, Valentine’s Day, Halloween, or even birthdays.

Frequently Asked Questions About This Cookie Craft for Kids
This activity works well for preschool through early elementary. Older kids can totally join in the fun, too! You can simplify it for younger learners or challenge older ones to design their own frosting and sprinkle styles.
Not at all! Hot glue is helpful if you want to make cookies that stay together, but you can absolutely skip it. Kid-friendly craft glue works great. If you’d rather reuse the pieces, just skip the glue entirely and enjoy open-ended play.
Basic craft felt works well and is easy to find at dollar stores, craft stores, or online. You can use a mix of colors.
Definitely! You can pre-cut all the shapes and store them in baggies or a tray. It’s a great go-to for a rainy day, holiday fun, or a quiet time activity.
Cute Craft Fun You’ll Want to Do Again and Again!
These felt cookies are such a simple hands-on way to enjoy time with your kids.
With a few basic supplies and a sprinkle of imagination, you can make a batch of colorful cookies that your kids will love to decorate. Whether you use this activity during read-aloud time, in a pretend play kitchen, or as part of a Letter C unit, there’s so much you can do with this flexible craft.
I hope that you have wonderful times with this project just like my boys and I did. Please let me know if you have any questions. Wishing you lots of sweet and creative fun!