A mobile microscope is such a smart way to easily boost your homeschool science.
This special type of tool can help you take your science studies to the next level in many ways.
Find out how my boys and I are using the uHandy mobile microscope kits in our homeschool and how you can get these amazing resources, too. Plus, grab the limited-time discount code to make it even more affordable!

Disclaimer: I received this product for free and was compensated for my time. As always, I’m sharing my honest opinions and was not required to provide a positive review.
Thinking Outside the Box for Homeschool Science Fun
Science can be such a fun part of your homeschool adventures.
You get the most amazing opportunities to explore new ideas and learn about different parts of our world (and beyond).
When you think about homeschool science, you may imagine more traditional resources – like textbooks and lab equipment. And it may seem overwhelming to get all the supplies and resources, like beakers and dissection materials, you need for quality homeschool science experiences.
I’ve shared how my overwhelm with how to effectively do science almost scared me off of homeschooling. When we began our homeschool journey, I was freaking out about how our family would be able to afford and organize all the materials, especially homeschool science supplies!
Over the years, my boys and I have discovered some smart ways to cut the costs and need for storage space for our science materials.
uHandy mobile microscope kits are our most recent ways to creatively and easily rock our homeschool science.

What Is a Mobile Microscope? And Why Would You Want One?
Let’s look at what a mobile microscope is – and why you’d want one to boost your homeschool science.
A mobile microscope is a scientific tool that you can use with your smartphone or tablet. This tool often comes in a kit that you can easily move around your home or outdoors.
Scroll down to find out more about how the uHandy microscope kits work.
A few of the benefits of using a mobile microscope (like uHandy) include:
- Portable
- Flexible (You can use on a variety of surfaces and in different places.)
- Easy-to-use
- Affordable
- Storage-friendly (doesn’t take up much space!)
My boys have loved being able to explore the world around us with our smartphone microscope. After using these tools for a few weeks now, I think these tools are perfect for families who:
- Homeschool on-the-go (like our family often is!)
- Roadschool
- Homeschool in small spaces (or with little storage space)
- Enjoy nature studies and other types of outdoor science fun
What You’ll Find in These uHandy Mobile Microscope Kits
My boys and I have been using two different mobile microscope kits from uHandy:
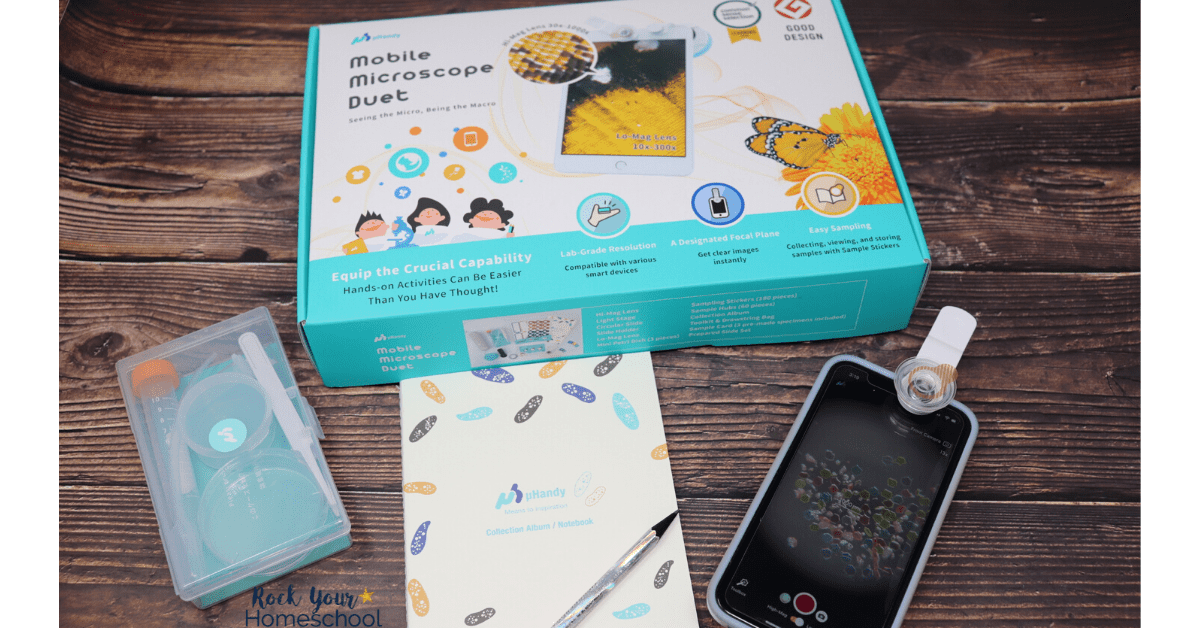
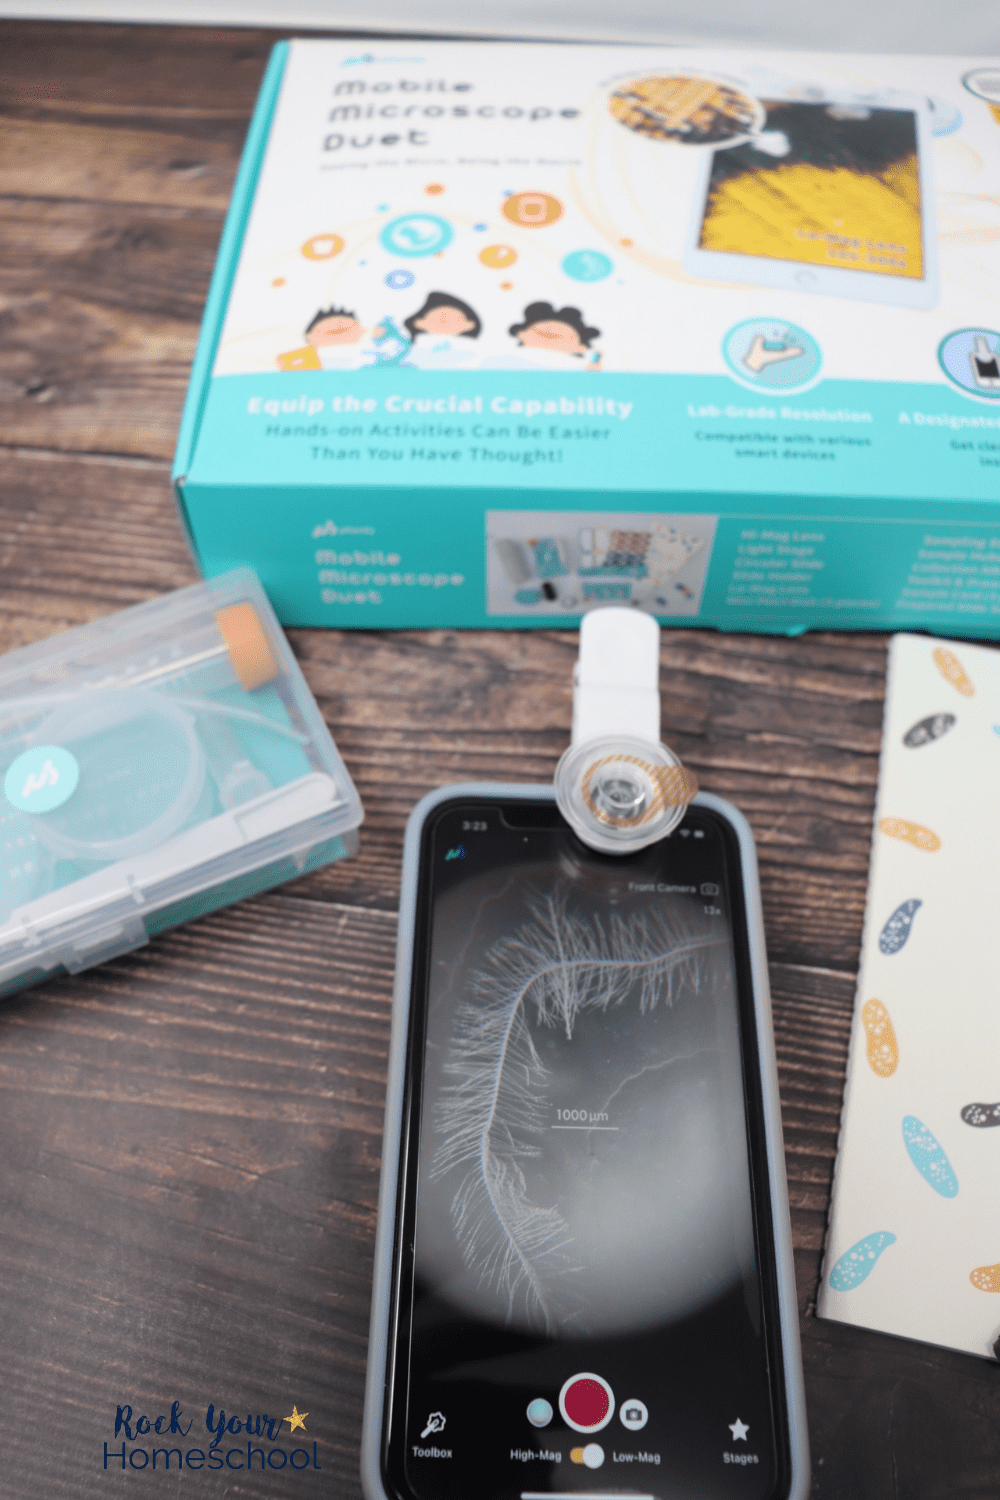
- uHandy Mobile Microscope Duet
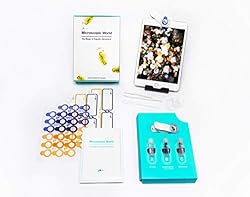
- Microscopic World: The Magic of Aquatic Adventure (includes uHandy Starter Kit)
The Duet kit contains:
- User Guide
- Hi-Mag lens (black)
- Lo-Mag lens (white)
- Light state
- Circular slide
- Slide holder
- Mini petri dish (3 pieces)
- 180 Sampling Stickers
- 60 Sample Hubs
- Collection Album (notebook)
- Toolkit & Drawstring Bag
- Sample Card (with 3 pre-made specimens)
- Prepared Slide Set

The Microscopic World kit contains:
- User Guide
- Microscopic Lens (Lo-Mag)
- Pipette
- Tweezers
- Culture Dish
- Sampling Stickers
- 3 aquatic specimen samples
You also get a QR code to the free uHandy app (iOS and Android) which is a cool mix of tutorials and virtual toolbox.

How to Use the uHandy Mobile Microscope
The free uHandy app (available for iOS and Android) has tutorials that make it super easy to get started and use these kits. I’ll break down how we’re using these science tools so you can get a feel for how it all works.
- When you get your kit, I recommend that you take some time to become familiar with the different materials. It helps to know what you’re working with 😉
- Go through the User guide and download the uHandy app. You may feel tempted to skip this step. Please don’t! You’ll have such a better experience when you know what to expect and do.
- You can either use the uHandy app (with toolbox) or the photo/video option on your phone. We prefer the app because it has extra features, like manual focus, scale bar, side light, and marking for counting.
Using the uHandy Lo-Mag Lens:
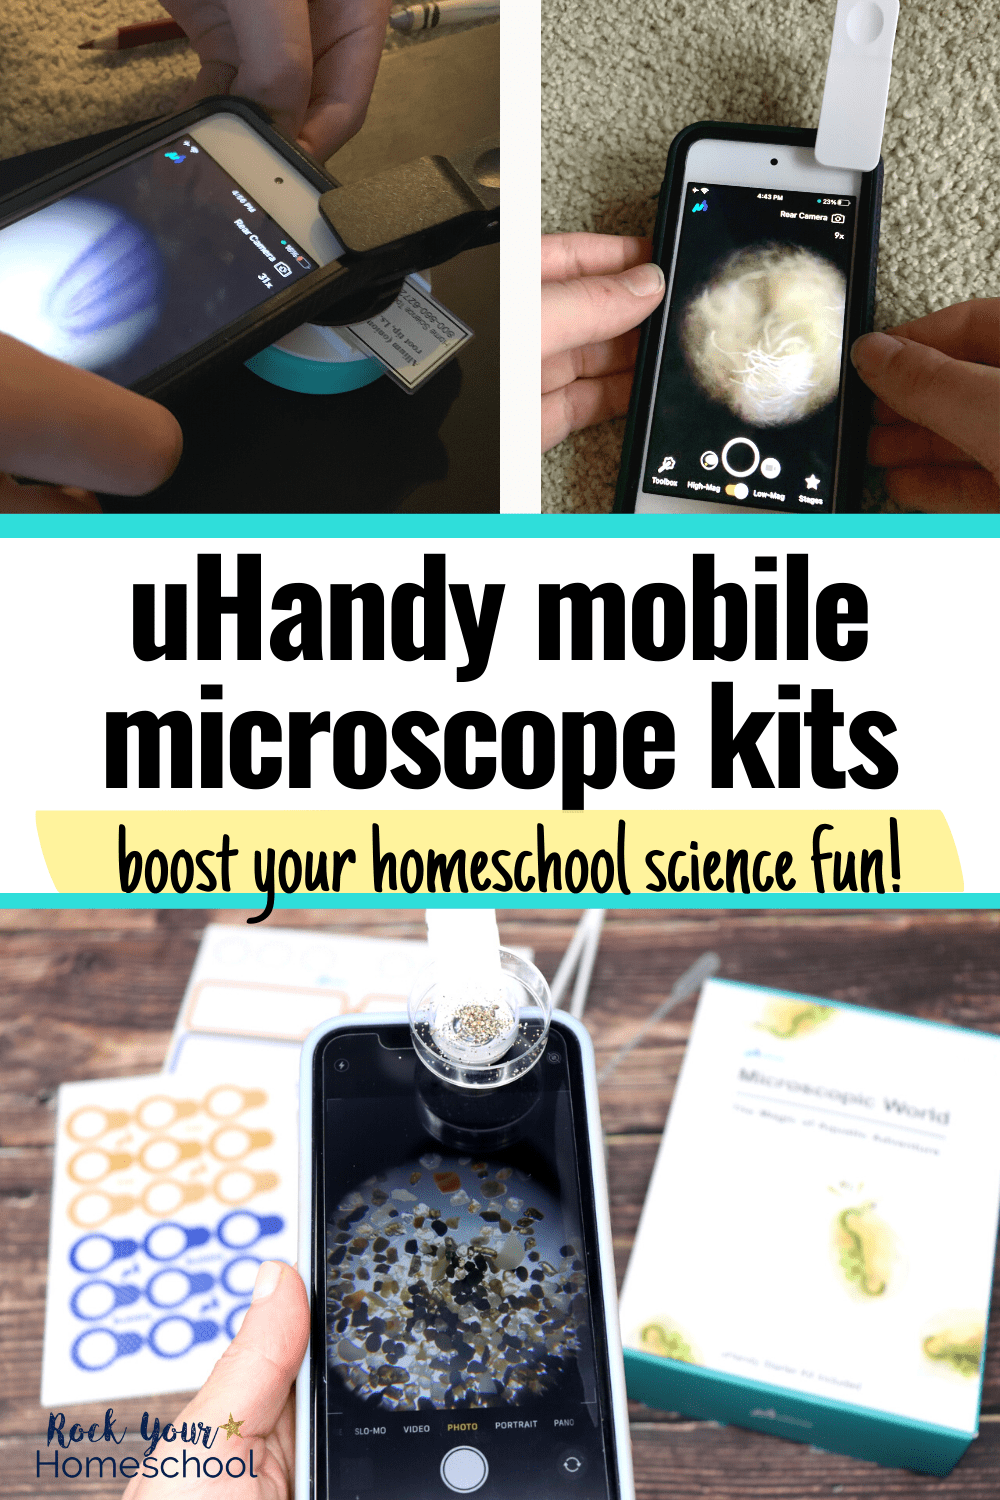
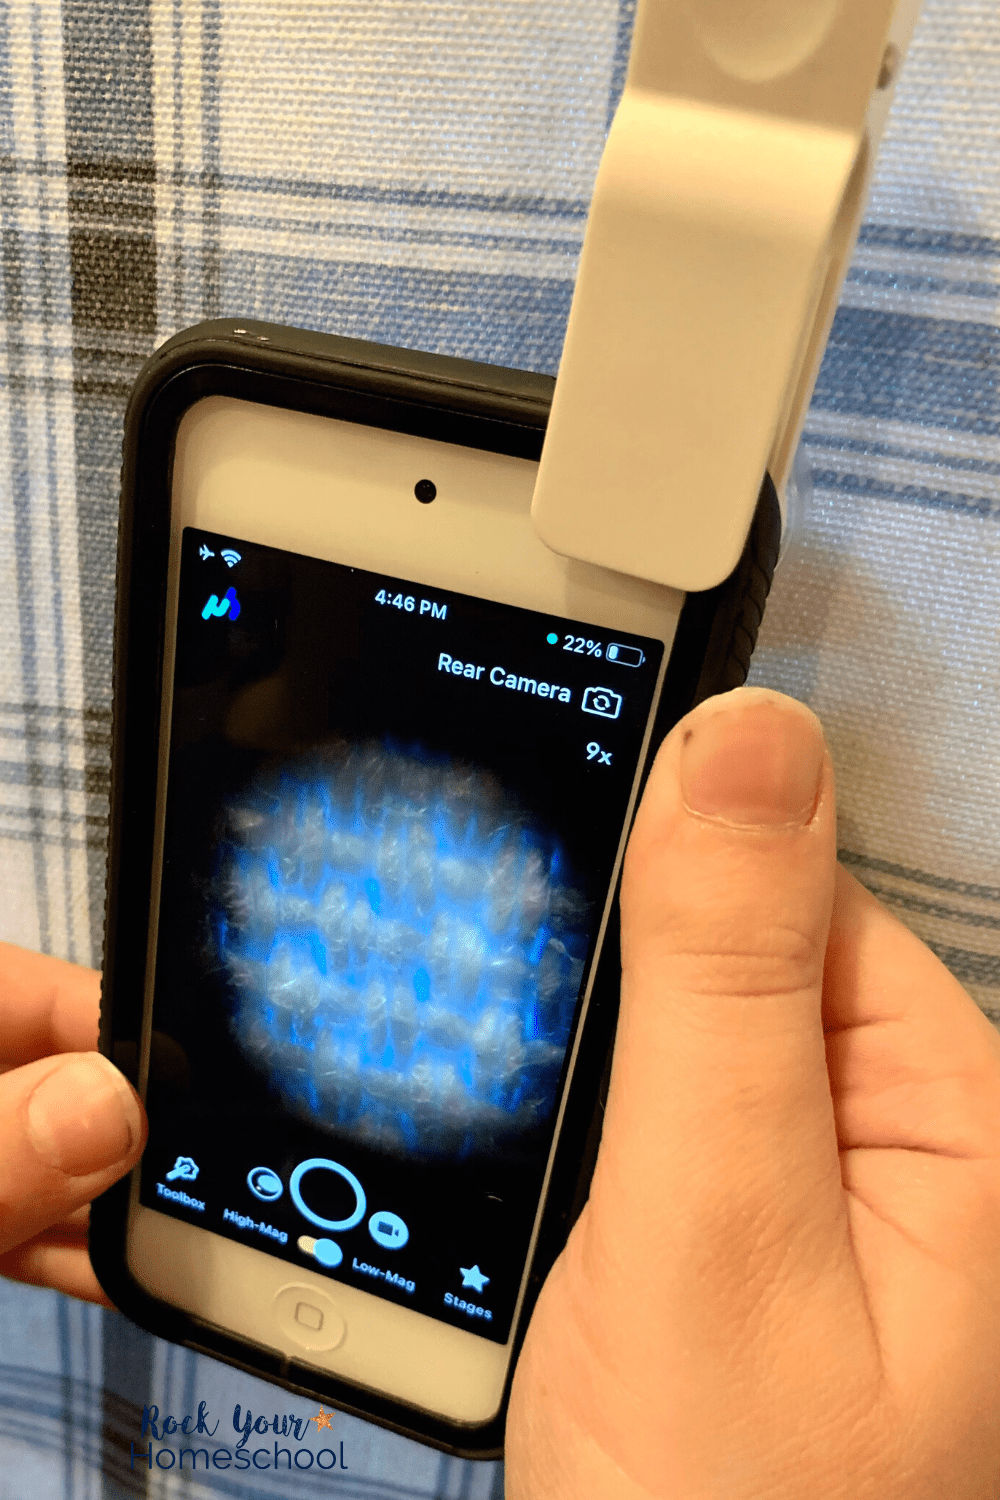
- Start with the Lo-Mag Lens. Clip the lens onto your smartphone or tablet camera area. Slowly move the lens around until the whitish circle is in the middle of your screen.
- Begin with the Rear Camera experience. With lens cap on, you’ll have a focus plane which is great for getting started and observing sample with flat surfaces.
- You can remove the lens cap and take it to the next level by bringing objects closer to the lens. A few things to explore are your fingertips (check out your fingerprints!), rocks, pencil tips, magazines, InkJet printed paper, carpet, and clothing.
- After you’ve tried the Rear Camera, unclip your uHandy Lo-Mag Lens and position on your front camera. Reattach the sample lens cap.
- You can start off with using the sample specimens (spices, down feather, glitter) included in your kit. Simply peel the sample sticker off the card and apply to lens. Adjust focus, if necessary.
- A super cool feature of this mobile microscope is the ability to take pictures or video of your samples. If you’re short on time (or just want to preserve your experience), take a picture of the sample.
- When you’re done with observing the sample sticker, remove from lens and reapply to card.
Using the uHandy Hi-Mag Lens:
- Clip the Hi-Mag Lens (black) to your rear camera.
- Assemble the Light Stage (teal circle) by using coin to loosen battery cap. Add the 2 included LR44 batteries and replace battery cap.
- The small black button on the side turns the light on when pressed down (and light off when it is released).
- Place the Circular Slide on the Light Stage with the magnet on top of the small black button. This step will keep the light on while you make your observations. You can gently rotate the slide to turn off the light – and gently rotate back to turn it on.
- At this step, you can use prepared sample stickers or make your own. If making your own sticker samples, make sure your specimen is thin enough to see through. The kits contain tools, like tweezers and pipettes, to help you gather specimens.
- OR you can use prepared glass slides that you’ve purchased or made on your own. Remove the Circular Slide. Lay your prepared slide across Light Stage. Place metallic Slide Holder on top to prevent slide from moving.
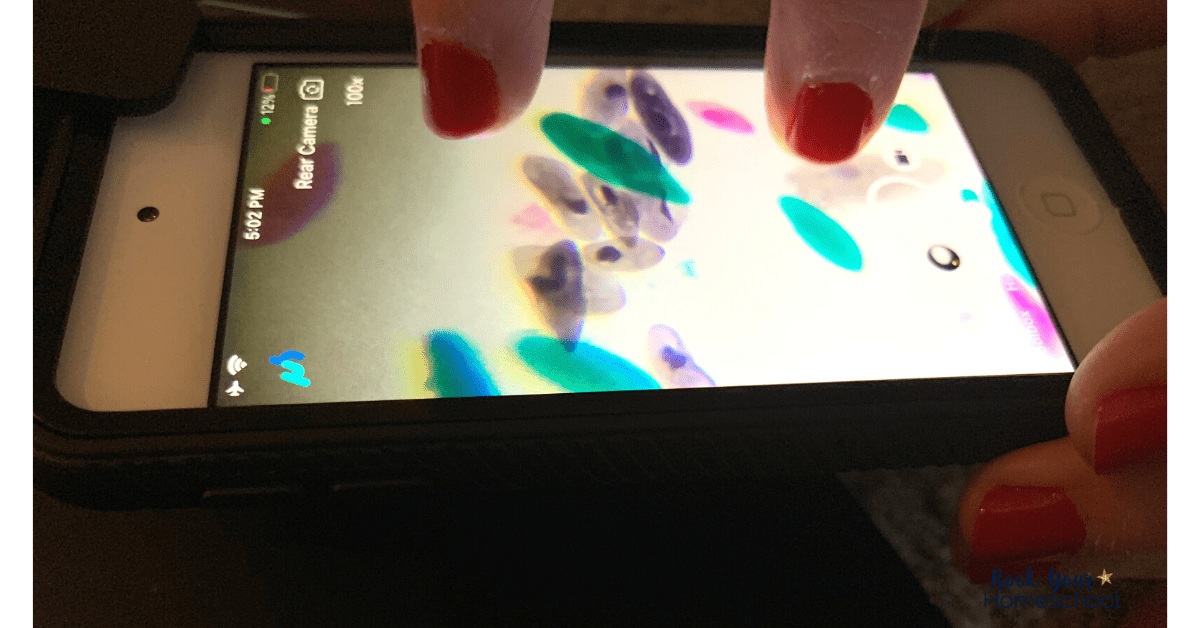
- Bring Hi-Mag Lens close to your sample and observe. You have the option of using your fingertips to expand (to magnify) or close (zoom out) the image. You can use your camera to take a picture or video.
Using Sample Stickers:
- Your uHandy mobile microscope kits contain 2 types of sample stickers: flat and bubble.
- Pick the appropriate sticker based on the type of specimen you plan on observing.
- Gently peel off the sample sticker to expose the sticky side.
- Add specimen. Make sure specimen is thin enough to see through.
- You can then use sample sticker on Sample Cap or add to Sample Hub (larger stickers to store your samples on).
- Consider keeping a Collection Album or Notebook (included in the Duet Kit). Store your Sample Hubs and Sample Stickers here.
Creative Ideas for Using a Mobile Microscope in Your Homeschool
Now that I’ve shared the nitty-gritty of the uHandy Mobile Microscope kits, I’ve got a few ideas on how you can use these tools to boost your homeschool adventures.
Make sure to take pictures and videos of your samples. You’ll be able to revisit your experiences and extend the learning fun. This step is awesome if you’re working with a sample that could deteriorate over time.
Maintain a mobile microscope notebook. Store your Sample Stickers and Sample Hubs along with dates and notes. These pages are fantastic ways to show progress and can be used in your homeschool portfolio.
These tools are mobile so enjoy the freedom to investigate objects in your home and outdoors. It’s fascinating to see everyday objects up close!
Use your mobile microscopes in other subjects and your homeschool unit studies. Your investigations can be used for creative writing prompts, practicing art skills, and even math problems.
FAQs about the uHandy Mobile Microscope
No, you can use one kit for your entire homeschool, if your kids don’t mind sharing. If you’ll be working on simultaneous projects or experiments, you may want a kit per student.
Nope! You can use your smartphone or tablet’s photo and video options. If you want to take it to the next level, get the app so you can use the virtual toolbox with features like manual focus, scale bar, side light, and marking for counting.
The uHandy Mobile Microscope is designed for grades 1-6. Younger kids can join in on the science fun with parental supervision. Kids of all ages can enjoy the experiences!
Resolution: Hi-Mag 1 µm / Lo-Mag 3µm.
Magnification: The maximum useful magnification is 1000x. Magnification within 10x~360x has the best effect. (Actual resolution depends on devices.)
Yes! Making and observing specimens has never been easier! No need to worry about glass breaking or getting smeared.
Just head over to loveuhandy.com to see videos, learn more about features, and read reviews.
Get Your uHandy Mobile Microscope!
If you’ve been looking for an easy and affordable way to take your homeschool science to the next level, you’ve got to check out all that uHandy Mobile Microscope has to offer.
These portable scientific tools make it simple to enjoy microscopic exploration.
AND these special discount codes can make it even more affordable!
uHandy Mobile Microscope Duet: Until January 31, use promo code ROCKDUET22 to get this kit for only $99 (usually $129.95)
uHandy Mobile Microscope: Aquatic Adventure: Also until January 31, use promo code ROCKAQUA22 to get this kit for $28.99 (usually $32.95)
Wishing you tons of homeschool science fun!
Do you have any questions about the uHandy Mobile Microscope kits? Please let me know in the comments area below and I’ll be happy to help!