This playdough turtle activity is a terrific hands-on activity that’s frugal, fun, and fantastic for creativity.
This project combines nature, sensory play, and imagination. With this turtle-themed playdough activity tray, you can encourage open-ended play as your child builds fine motor skills and more. This activity is perfect for summer fun, turtle life cycles, or just because you need a low-prep way to keep little hands busy and engaged.
I’m sharing tips and suggestions for supplies based on my experiences with my boys. You can totally customize this activity with what you have!
Turtle Time Just Got Even More Fun
Are you looking for a simple way to help your students enjoy turtle-themed activities? Maybe you’re planning and preparing for a summer camp, Letter of the Week (Tt), or having a turtle party? Perhaps you’re just busy and need screen-free ways to keep your kids engaged in a meaningful way?
Well, this playdough turtle activity tray is an awesome way to do all of those things and more!
After sharing our egg carton turtle craft, I was reminded of a turtle playdough invitation tray that was a big hit with my boys. This kind of activity has always been one of my favorites because it’s super simple to set up and gives kids so many chances to play, explore, and learn with their hands. You can totally use what you already have at home because there’s no need for anything fancy!
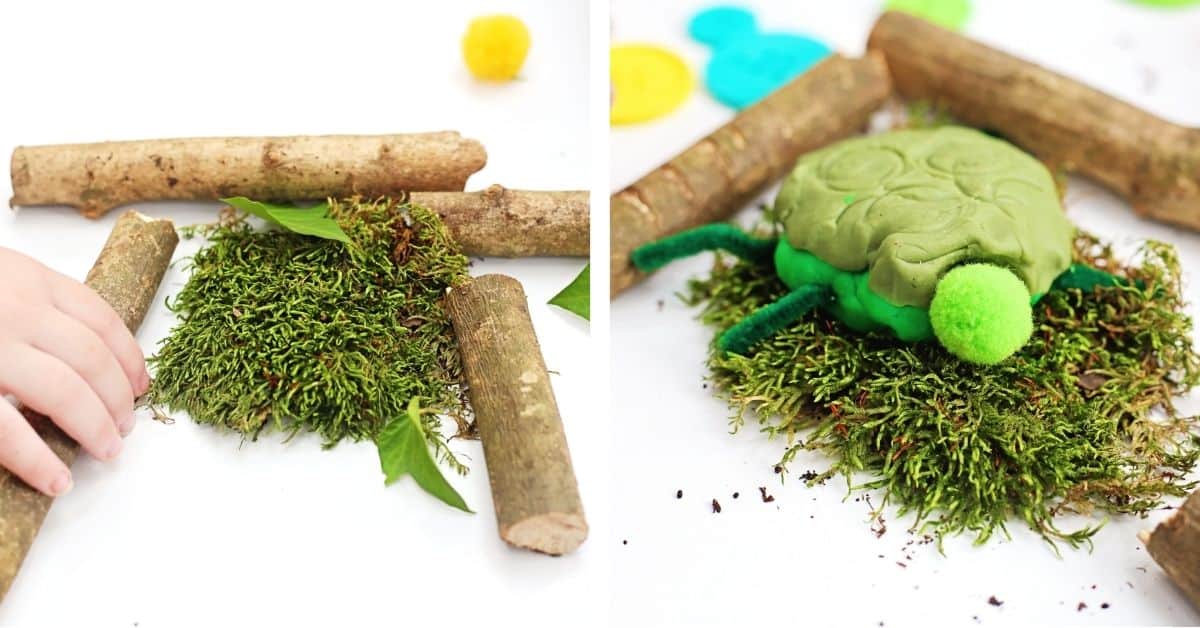
In fact, we loved turning it into a little nature scavenger hunt. We’d head out into the yard or to a nearby park. The boys would collect twigs, pebbles, moss, and acorns. Then, we’d add those to our tray for even more turtle fun.
I loved seeing how each of my boys used the materials in different ways. Some boys focused on building the perfect turtle home while others got creative with decorating their turtle shells. So much learning all wrapped up in one frugal and fun activity!
Suggested Supplies and How to Make Your DIY Turtle Activity
You don’t need much to make this turtle playdough invitation tray a success. Most of these craft materials are easy to find around your home or yard. Here’s what we used:
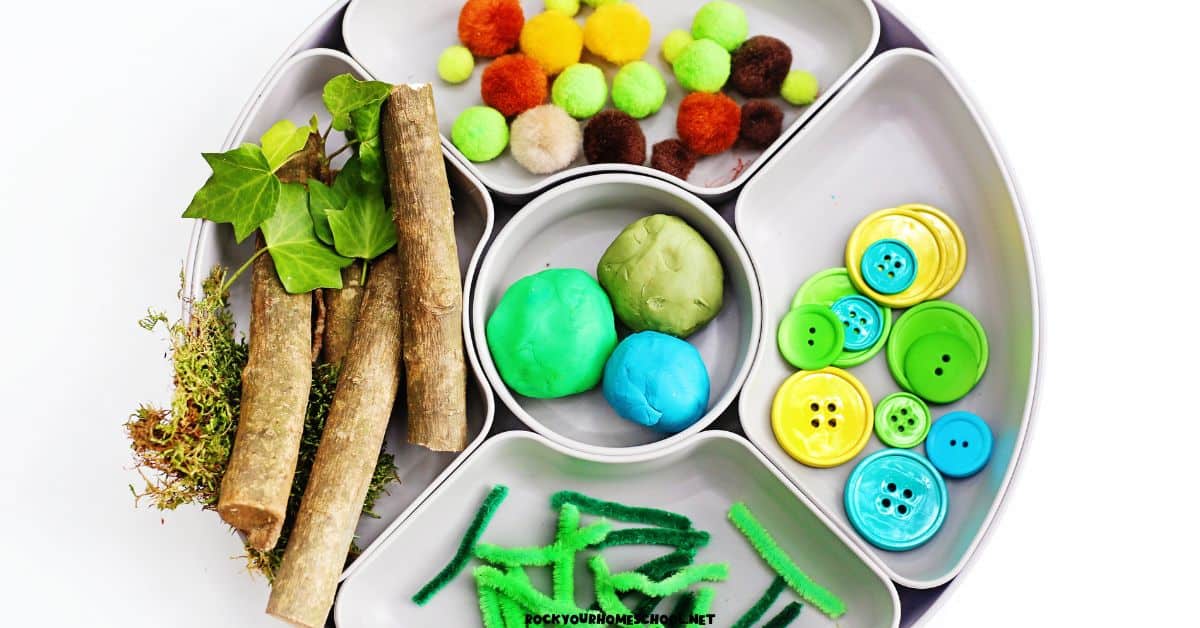
- Different shades of green playdough (store-bought or homemade)
- Pipe cleaners
- Pom poms (earthy and bright colors)
- Assorted buttons
- Nature items like small sticks, leaves, moss, pebbles, and acorns
Feel free to swap out or add to this list with whatever inspires you. The goal is to have a variety of textures and materials for open-ended play!
Ideas for Making Your Turtle and More
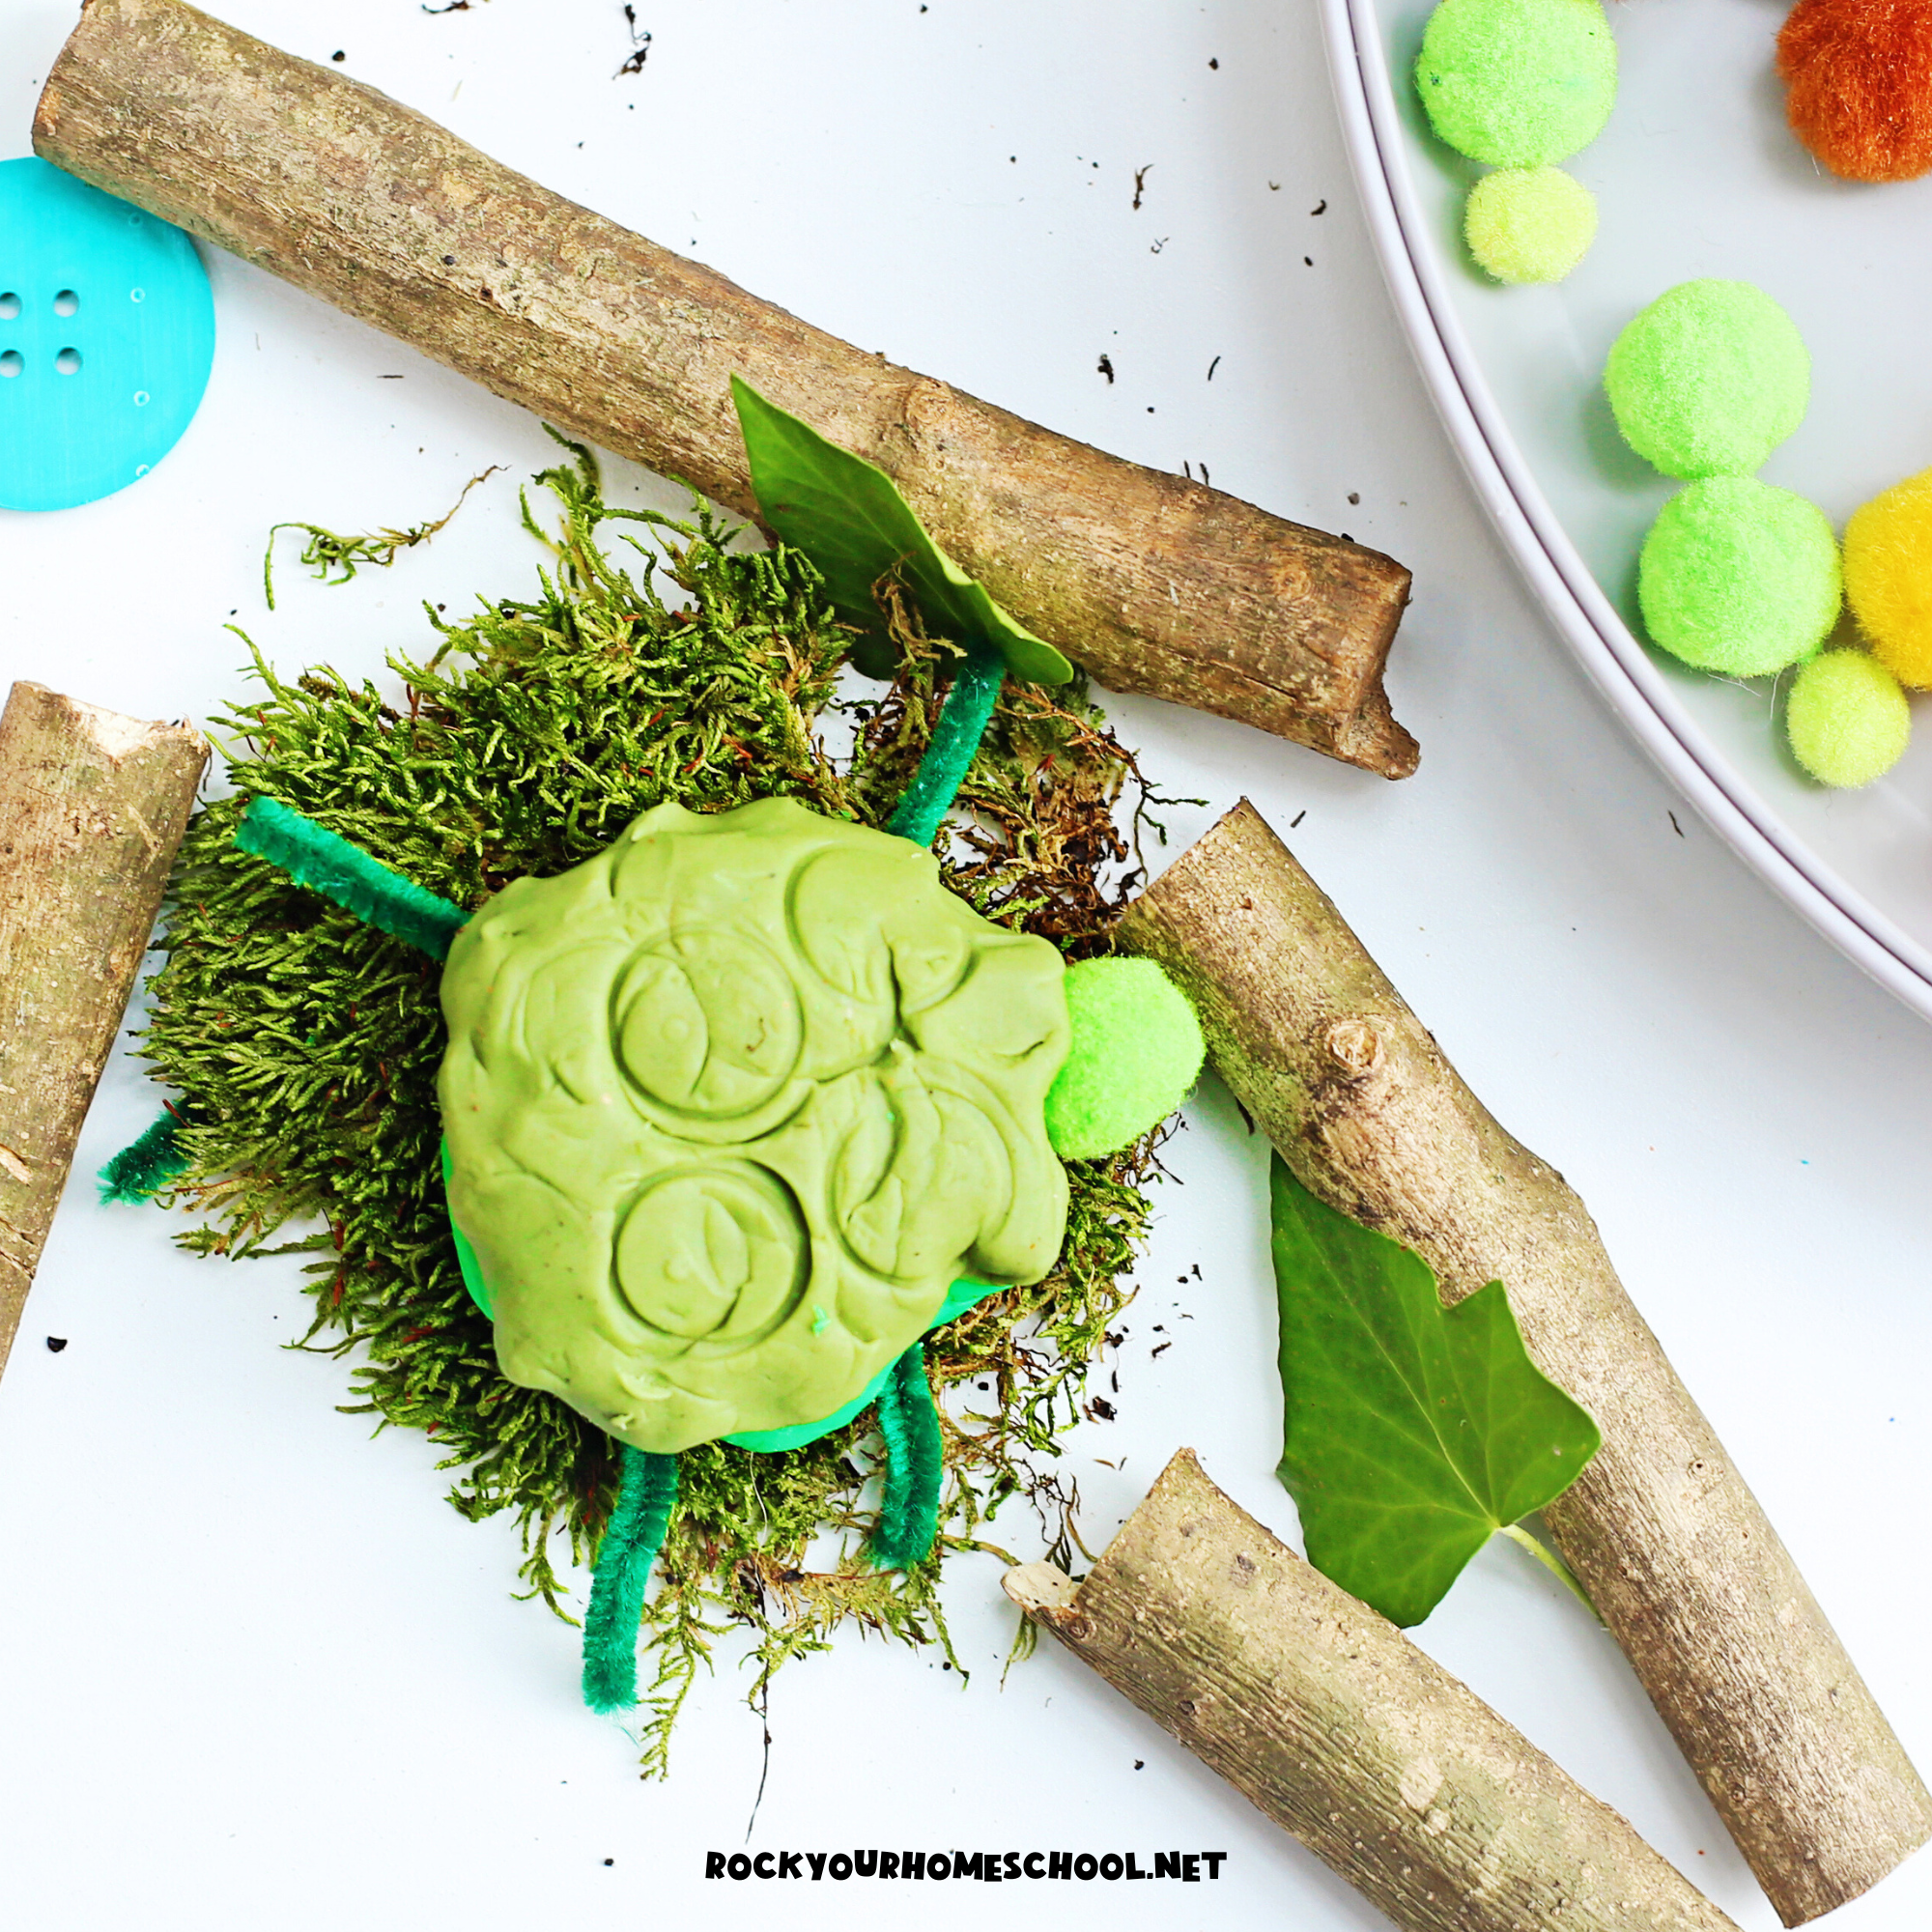
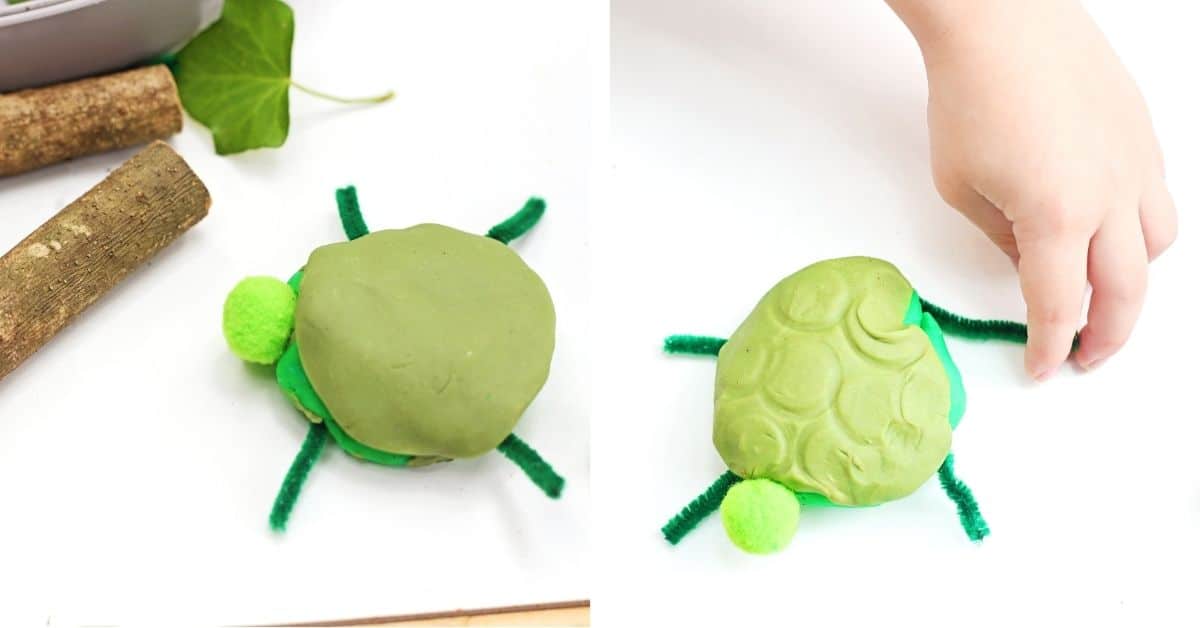
- Make Your Turtle: Use the playdough to shape a turtle body. Use a different shade of green for the shell.
- Add Details: Use pipe cleaners for turtle legs or tails. Add a pom pom for the head or use them as turtle eggs in your habitat.
- Design the Shell: Press the buttons into the playdough shell to create fun textures and patterns. Try different sizes and colors!
- Create a Turtle Habitat: Use the sticks, moss, and leaves to build a cozy turtle home around your creation. You can make a little pond with the blue playdough or create a forest floor with the moss and sticks.
Top Tips for Using Your Playdough Turtle Tray
This DIY turtle playdough tray is such a fantastic way to boost imagination and build essential skills. Here are a few fun ways to make the most of it:
- Story Starters: Encourage your children to create a story about their turtle. What’s their name? Where do they live? You can either record your child sharing their story or jot it down for them.
- Sensory Experiences: Chat about the different textures being used. Ask how the playdough feels compared to moss or buttons.
- Habitat Building: Challenge your students to make their own turtle habitat. You can use a tray or shoebox to store your creations.
- Celebrate World Turtle Day: Add this activity to your celebration on May 23.
Frequently Asked Questions About This Playdough Turtle Activity
This tray is great for preschoolers through early elementary-aged kids. Younger ones may need some help getting started. Older students love the creative freedom, too.
Totally! Store-bought works just fine. If you prefer homemade, that’s awesome – we do, too!
No worries! Get creative with what you have. Try felt scraps, cotton balls, tissue paper, small LEGOs, or craft sticks.
Absolutely! This tray is all about open-ended play. If your child ends up making a dinosaur, robot, or squishy taco, just roll with it.
A divided tray, small bin, or zip-top bags work great for keeping the materials together. You can reuse the playdough and loose parts again and again.
Enjoy Your Creative Turtle Activity!
This playdough turtle activity is such a simple approach to encouraging sensory exploration, hands-on learning, and having screen-free fun.
It’s so cool to use this project at different times. You can customize it using what you have then and there. It’s a wonderful reminder that learning doesn’t have to be complicated or expensive to be meaningful.
If you give this turtle playdough tray a try, I’d love to hear how it goes! Leave a comment or tag me on Pinterest so we can celebrate your fun-focused learning together.