This easy watermelon playdough recipe is a sweet way to enjoy hands-on activities with kids.
It’s simple to make and a fun way to keep your kids busy (and learning!) this summer. Plus, this homemade playdough smells amazing so adds a cool sensory touch that makes simple counting, fine motor skills, and more even more fun to practice.
I’m sharing my tips and creative ideas for using based on my experiences with my boys. I had a few thoughts on how to use and they added their own. Find out more so you can make your own sweet memories this summer and beyond.
Simple Fun with DIY Watermelon Activity
Playdough has been one of my absolute favorite tools for helping my boys get creative while building fine motor skills.
While we’ve used our fair share of store-bought playdough over the years, I much prefer to make my own homemade batches when I can. There’s just something amazing about watching the ingredients come together, especially when it’s based on my mom’s tried-and-true playdough recipe from her days as a kindergarten teacher. It’s been passed down like a family treasure and has become a part of our homeschool.
My boys and I love to experiment with fun variations to match our learning themes, like hot chocolate playdough in winter, peppermint around the holidays, and even pumpkin or gingerbread in the fall. This watermelon version of our playdough is a total summer win! It’s super easy to make, smells incredible, and sparks incredible imaginative play.
When my boys were younger, they had a blast shaping their own watermelon slices, adding pretend seeds, and coming up with all sorts of creations. It’s the kind of simple activity that turns into sweet memories and one I’m so excited to share with you!
What You’ll Need to Make Your Watermelon Playdough
You only need a few supplies to make your own soft, colorful, and watermelon-scented playdough! Most of these ingredients are probably already hanging out in your kitchen.
I’ve listed everything below to help you gather what you need. Feel free to tweak the colors or scents to match your kids’ preferences or learning theme. It’s all about making it work for you!
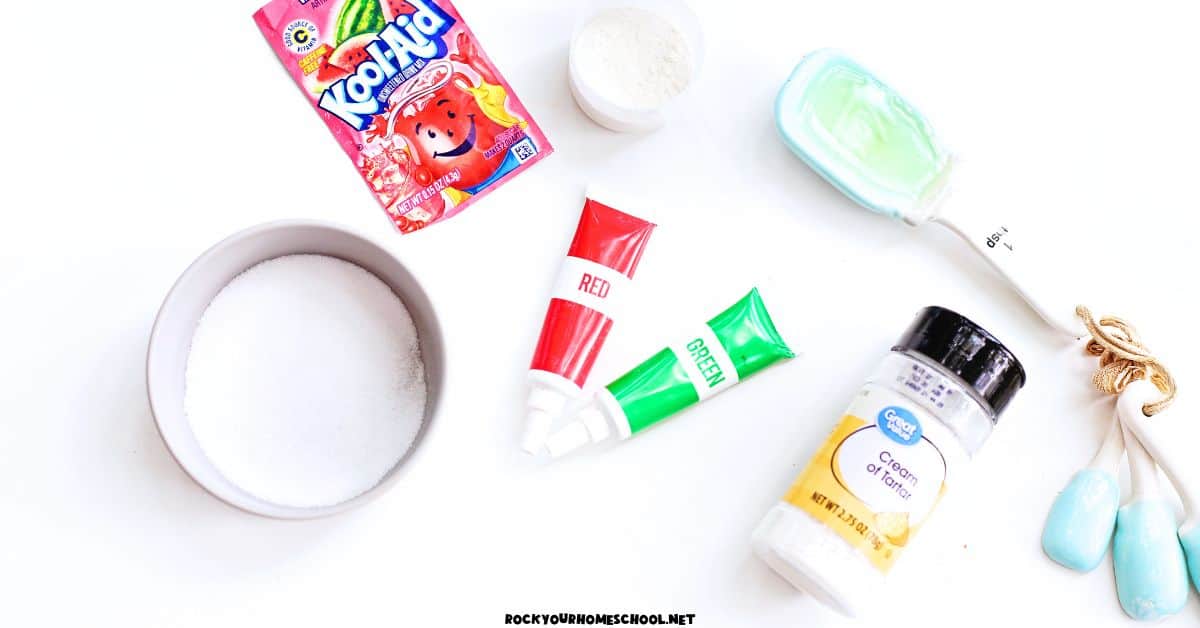
- 1 cup flour
- 1/2 cup salt
- 1 packet Watermelon Kool-Aid (unsweetened)
- 1 cup boiling water
- 2 tbsp cream of tartar
- 1 tbsp oil
- Red and green food dye
How to Make Watermelon Playdough
Just follow these steps to make your own watermelon playdough.
- In a large bowl, mix together the flour, salt, and cream of tartar.
- Boil 1 cup of water over medium heat.
- Once boiling, carefully pour the water into a heat-safe glass or bowl and stir in the oil.
- Slowly pour the hot water/oil mixture into the dry ingredients and stir until a dough forms. Dough will solidify as it cools.
- Let the dough cool for 5–10 minutes.
- If the dough is still sticky, add 1/3 cup of flour at a time until it becomes soft and pliable.
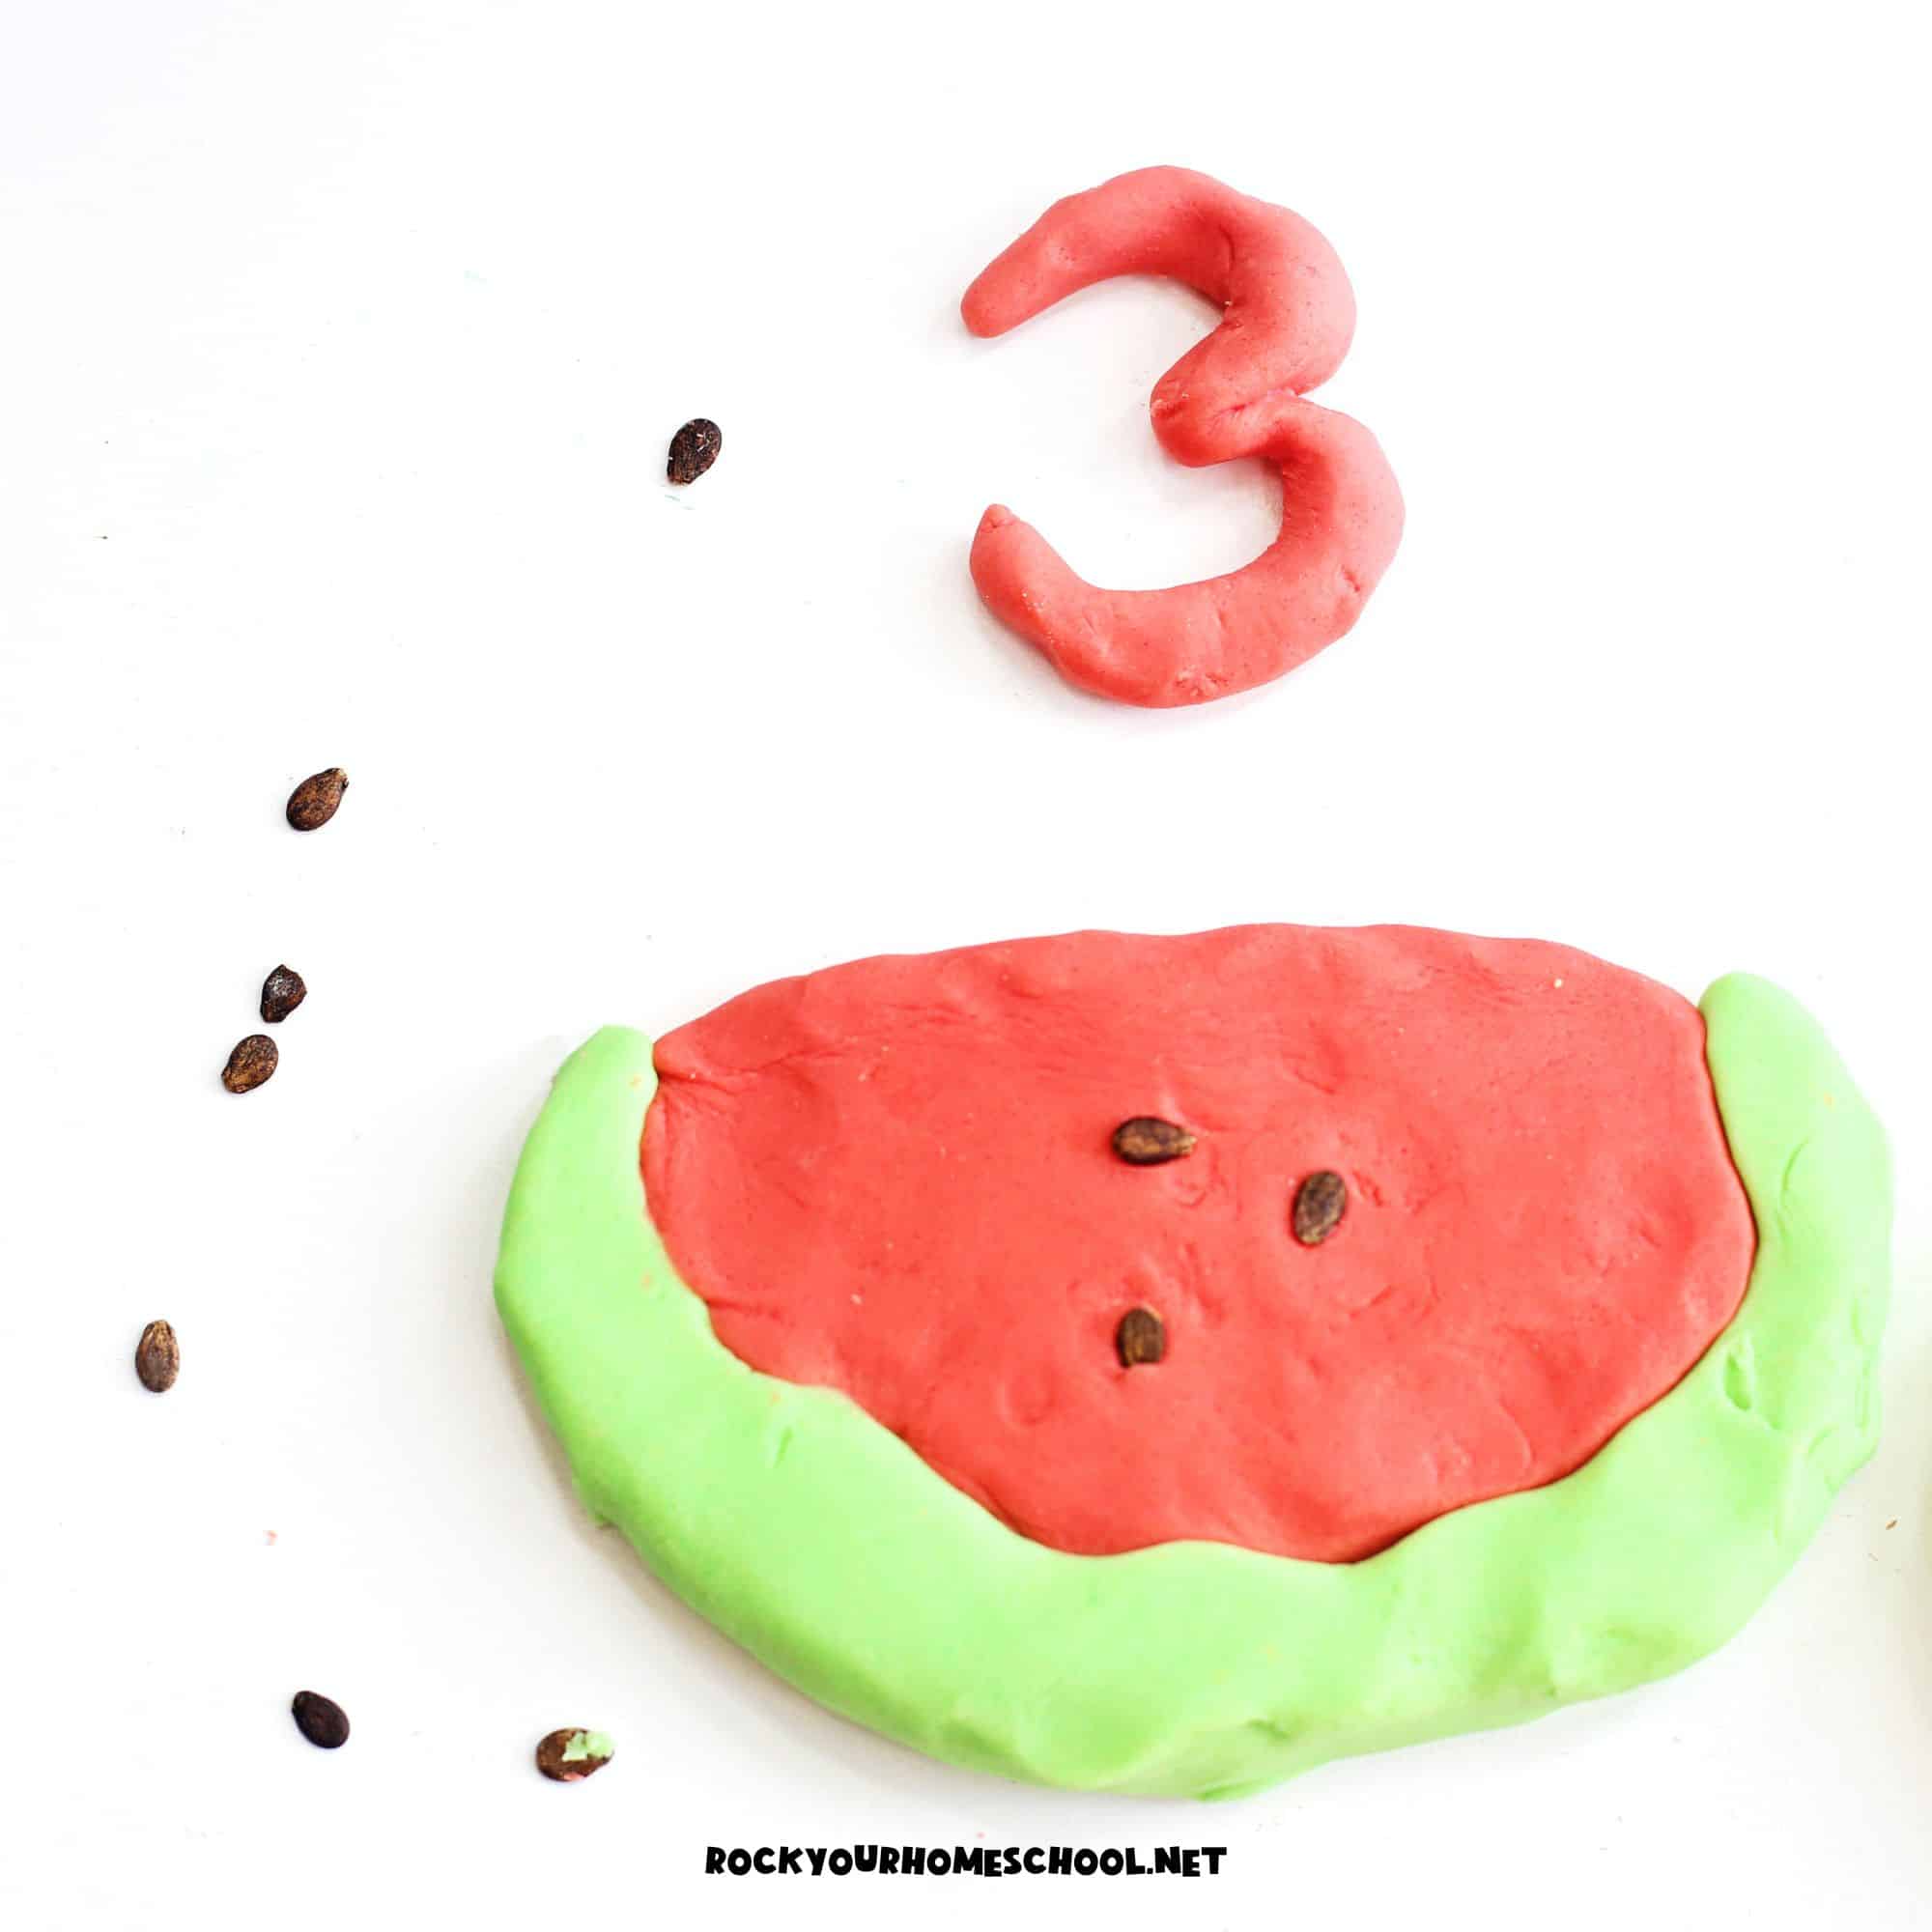
- Once cool, divide the dough into two balls:
- About 1/4 of the dough will become the green “rind.”
- The remaining 3/4 will become the center.
- To color the green rind, add a few drops of green food dye. Knead until fully combined.
- To color the red fruit, add the packet of watermelon Kool-Aid and a few drops of red food dye. Mix until the color and scent are well incorporated.
Creative Ideas for Using Your Watermelon Playdough
Once you’ve made your batch of watermelon playdough, the real fun begins! This squishy dough is great for imaginative play. And it’s also a fantastic tool for hands-on learning. Here are some of our favorite ways to use it:
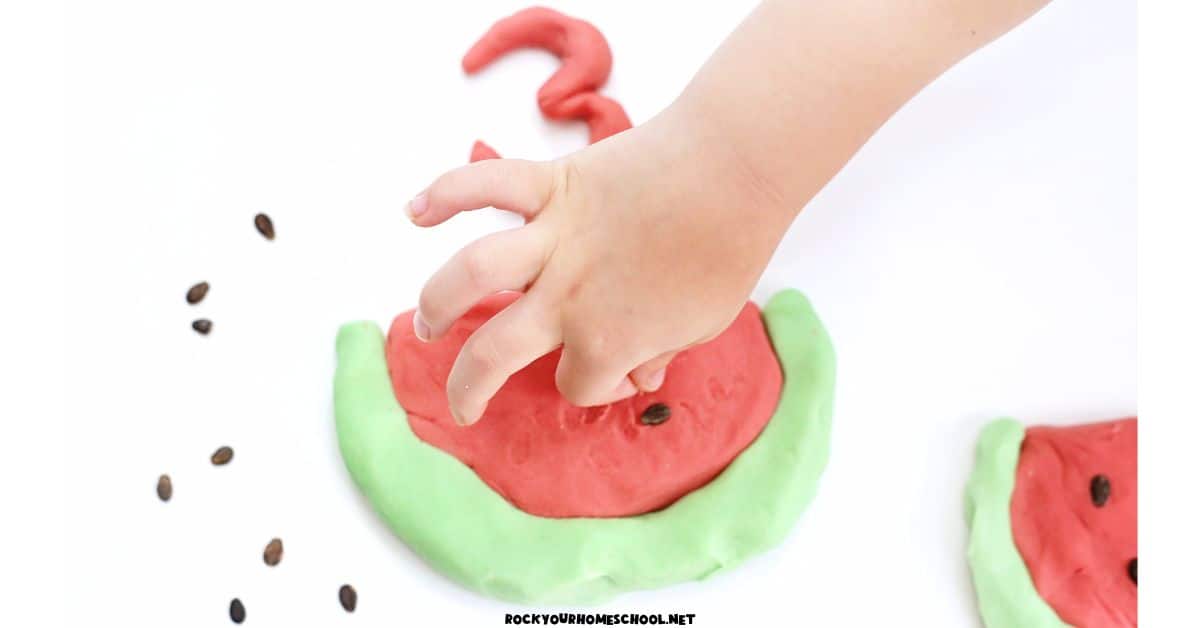
- Making and Counting Seeds: Roll your red playdough into watermelon slices and add small black beans or press-in “seeds” made from black playdough. You can also use black pom poms, buttons or other craft supplies. Use number cards or dice to practice number recognition and counting. Your older kids can even create simple addition or subtraction problems.
- Letter and Name Practice: Use the playdough to shape letters (like W for watermelon). You can roll out long “snakes” to form the letters, your child’s name, sights words, and more.
- Storytelling and Free Play: You can use prompts to encourage kids to create a watermelon picnic scene, complete with tiny playdough fruits, plates, and even ants. Also, brainstorm other scenes that often have watermelon, like a barbecue, beach, or other special event. Then, ask them to tell a story about their creations.
- Color Sorting and Patterns: Make small balls or shapes in red and green. Use simple patterns or sorting by color and size.
- Fine Motor Fun: Let your child roll, pinch, squish, and slice their playdough. Provide them with kid-safe tools like plastic knives, cookie cutters, or toothpicks (for older kids) to boost those small hand muscles.

Frequently Asked Questions for DIY Playdough
This activity is great for toddlers, preschoolers, and early elementary kids. Older students can join in for sensory fun, STEM extensions, or creative storytelling. Just supervise younger children closely, especially if they like to taste-test things because this dough isn’t meant to be eaten!
We store our DIY playdough in airtight containers or resealable plastic bags. It usually stays soft for a few weeks when kept at room temperature. If it starts to dry out, kneading in a few drops of water or oil can help bring it back to life.
Sure! The Kool-Aid adds color and scent. If you’d rather skip it, you can use just food coloring or try a natural alternative. Your playdough will look different than our examples but you can have a lot of fun.
You can, but the texture might not be as smooth or stretchy. Cream of tartar helps preserve the dough and gives it that soft feel.
Enjoy All of Your Watermelon Fun!
I hope this easy watermelon playdough activity adds a splash of creativity and joy to your summer days. Whether you’re looking to keep little hands busy, add some fun to your homeschool learning, or just make some sweet memories together, this sensory activity is such a simple and satisfying way to do it.
If you give this activity a try, I’d love to hear how it goes. Leave a comment below or send me a quick note!