This adorable toilet paper roll groundhog puppet is the creative way to celebrate this fun day with kids.
Using just a few simple supplies, your kids can create their own cute groundhog to enjoy hands-on play, rainy day fun, or screen-free activity.
I love how this craft project allows you to recycle toilet paper rolls by transforming them into decorations and DIY toys. So, grab those toilet paper rolls and let’s turn them into something delightful!
Related: Keep your celebration going with this free set of Groundhog Day color by number pages.
Why a Groundhog Puppet is Perfect for Celebrating with Kids
Looking for a fun and frugal Groundhog Day activity to use with your children? Or maybe you’re planning for Letter of the Week and need something special for the letter “Gg”?
I think you’re going to love this super cute craft that also involves recycling!
Groundhog Day is a big thing where I live in Western Pennsylvania. We’re not too far from Punxsutawney, the home of Punxsutawney Phil and Gobbler’s Knob.
When my boys were younger, I tried to explain this tradition the best I could. To be honest, I never quite into it. But, it’s something fun and the boys were interested. So, I put together resources and activities to boost the occasion. Would the groundhog see his shadow and we’d have an extra six weeks of winter? Or would spring come early this year?!?
This groundhog toilet paper roll puppet craft was a big hit! The boys enjoyed creating their very own Phil and I like having something to keep them busy.
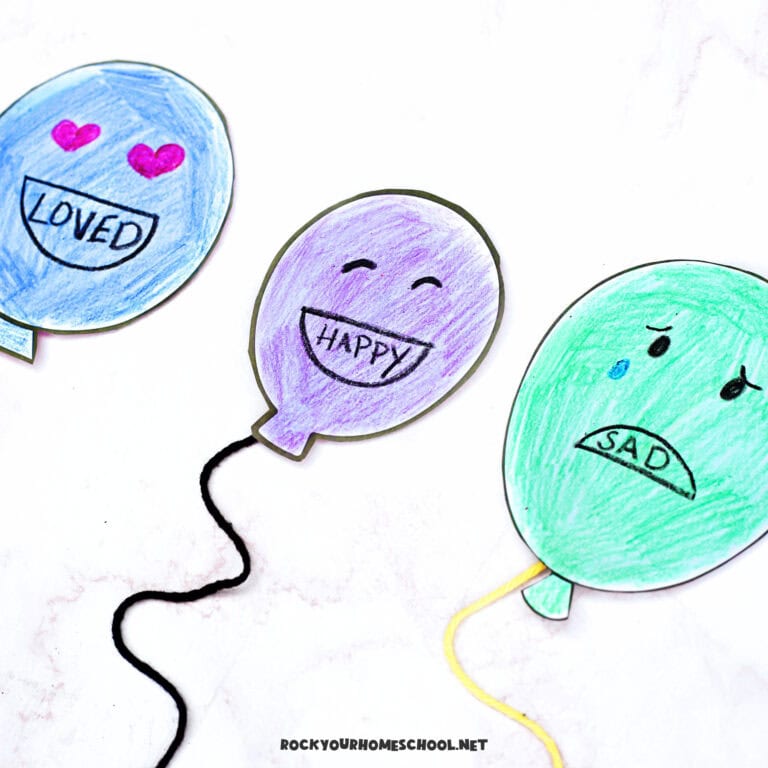
And you can even turn it into a social-emotional learning activity by having your children talk about different emotional expressions (like happy, sad, etc.) to add to their groundhog. It’s a simple way to help kids practice empathy by chatting about how they think the groundhog feels when they see their shadow (surprised, scared) and when it comes out of its hole.
I love when you can add an emotional intelligence activity layer to a project!

Supplies Needed for Your Toilet Paper Roll Groundhog Puppet
This kids’ craft uses only a few materials (and you probably already have them in your home or classroom). If you’re working with a larger group of students (or don’t have a lot of time for this project), I recommend doing some prep work prior to starting.
To do this groundhog craft, you will need:
- Toilet Paper Roll
- Green, Brown, and White Construction Paper
- Popsicle Stick
- Black Marker
- Glue
- Scissors
How to Make This Groundhog Craft
01
Prepare groundhog head pieces
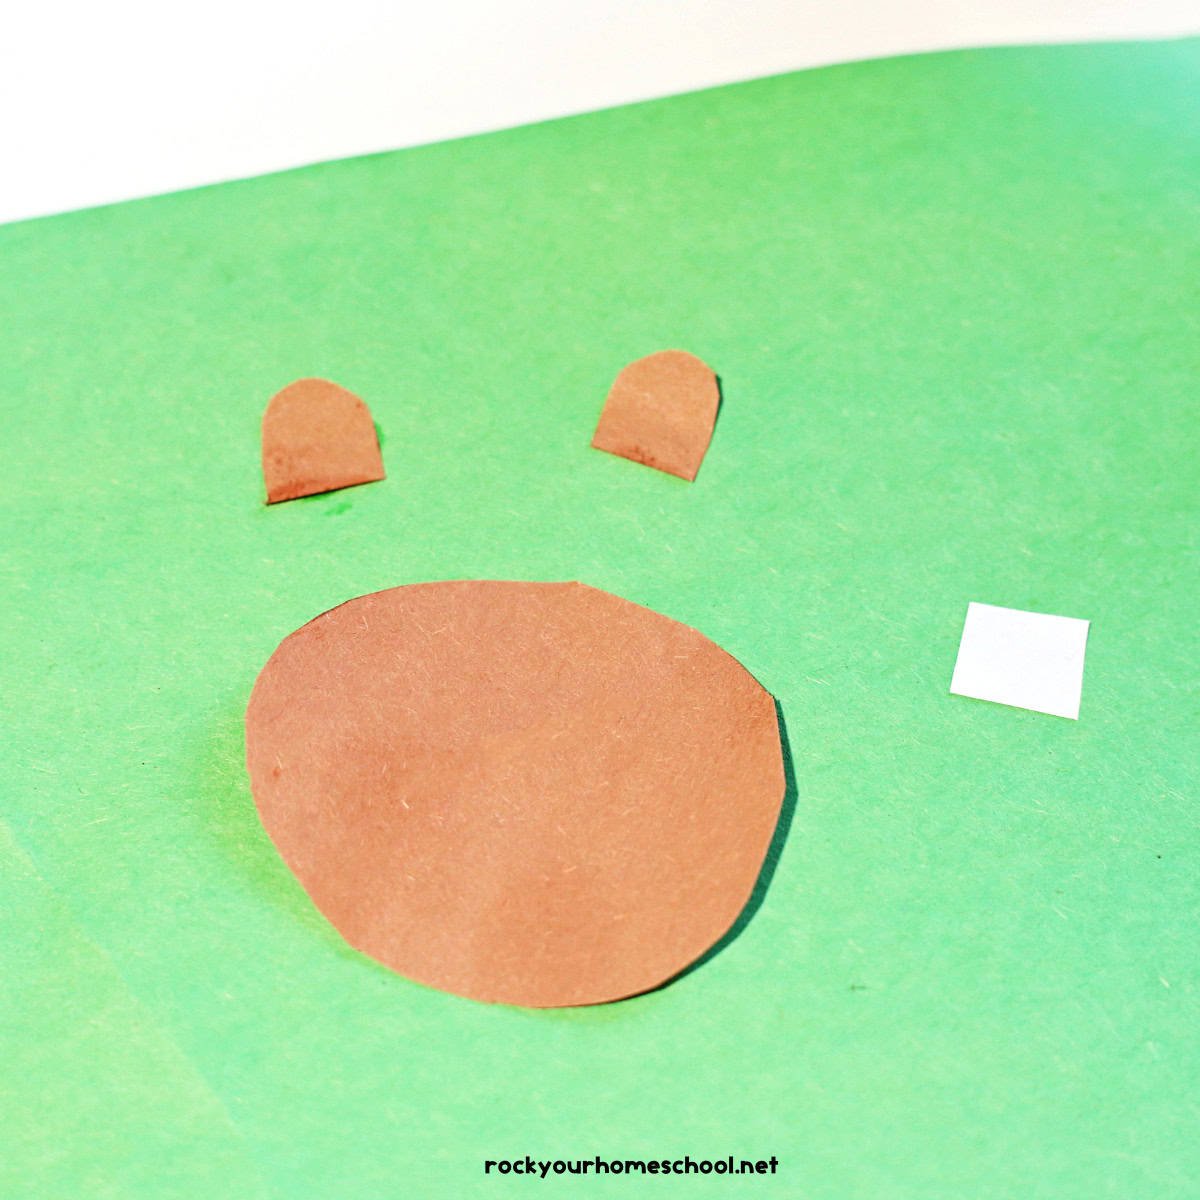
Cut out all shapes for the groundhog head from brown paper. Cut one larger oval for the head and one small oval cut in half for the ears.
Cut a small half oval from the white paper for the teeth. A rectangle works, but the half-oval looks better.
02
Make the groundhog head
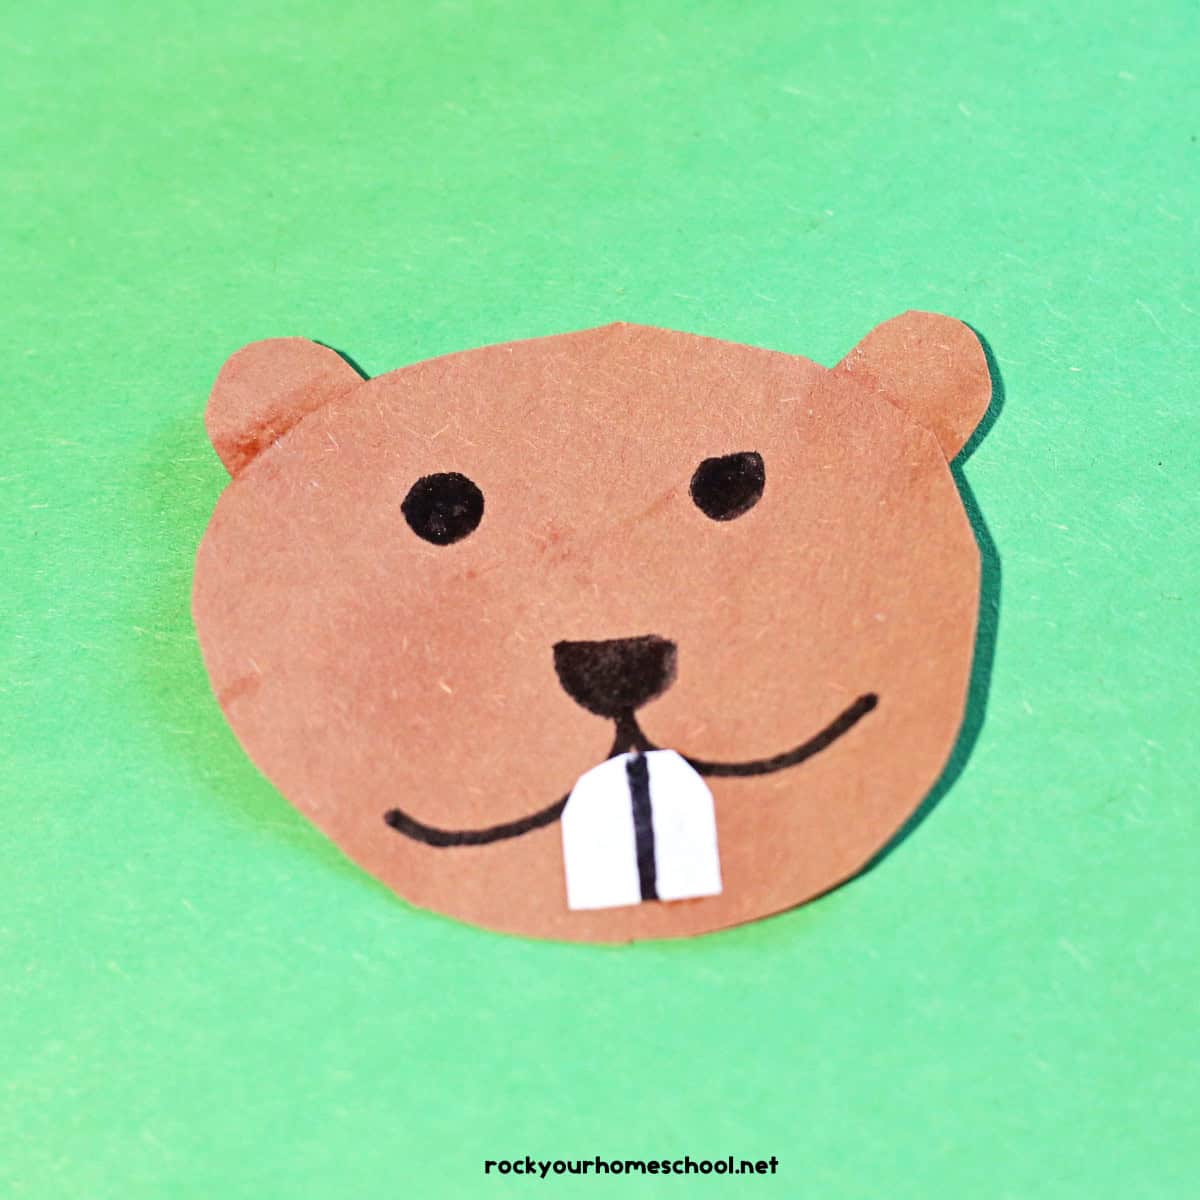
Glue the ears to the back of the head.
Draw the groundhog’s eyes, nose, and mouth. The mouth should rise to meet the nose, like an upside-down M on the front.
Glue the teeth in place.
03
Add stick
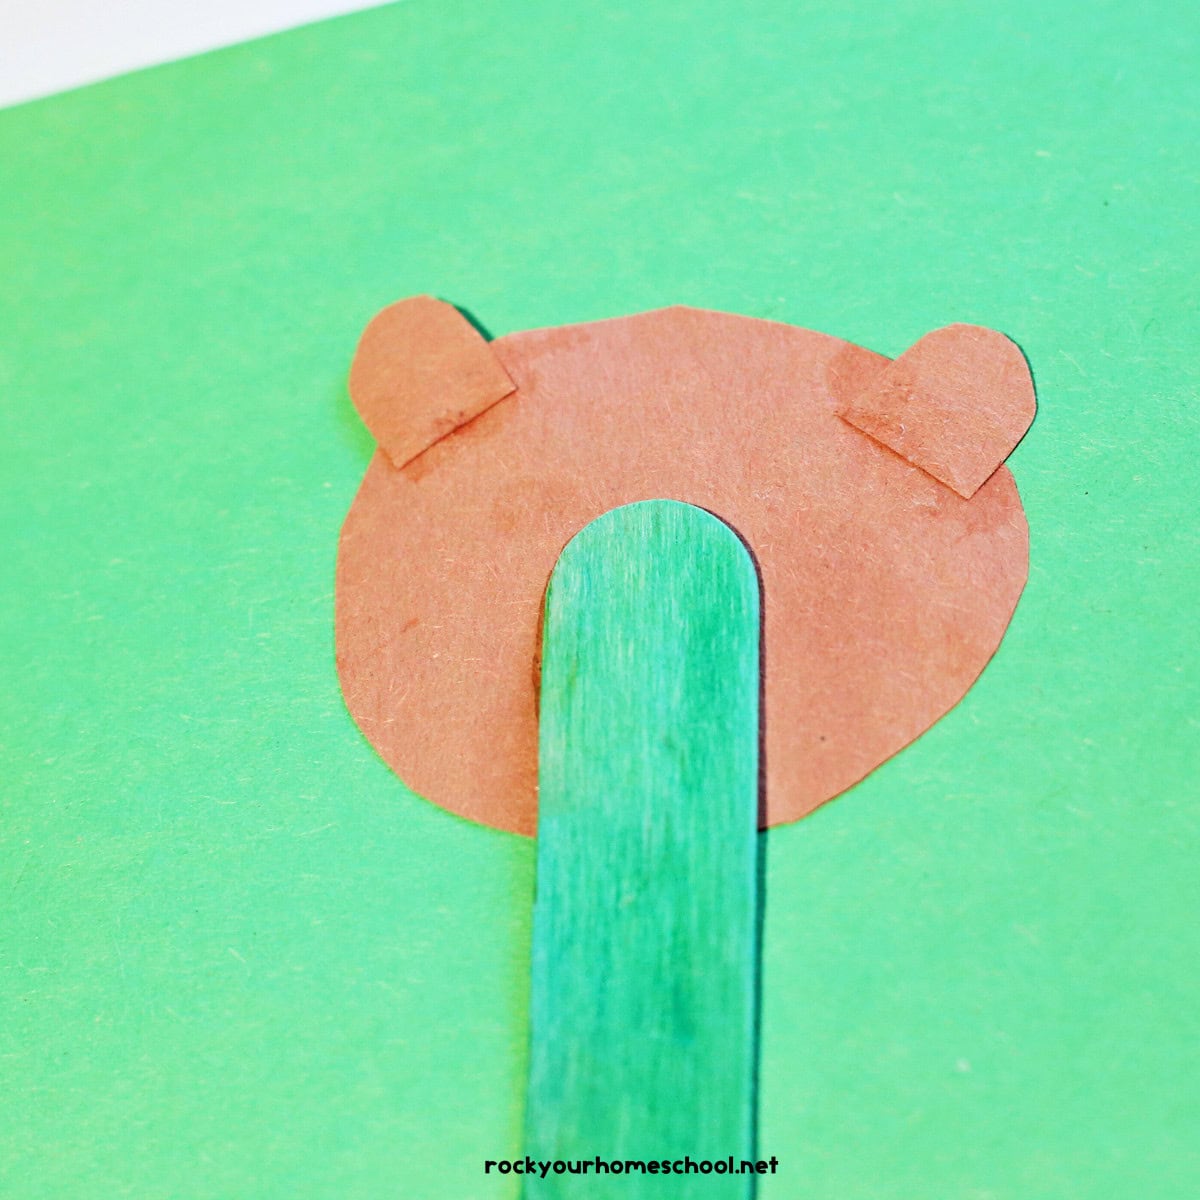
Glue the stick to the back of the groundhog head.
04
Prepare groundhog lair
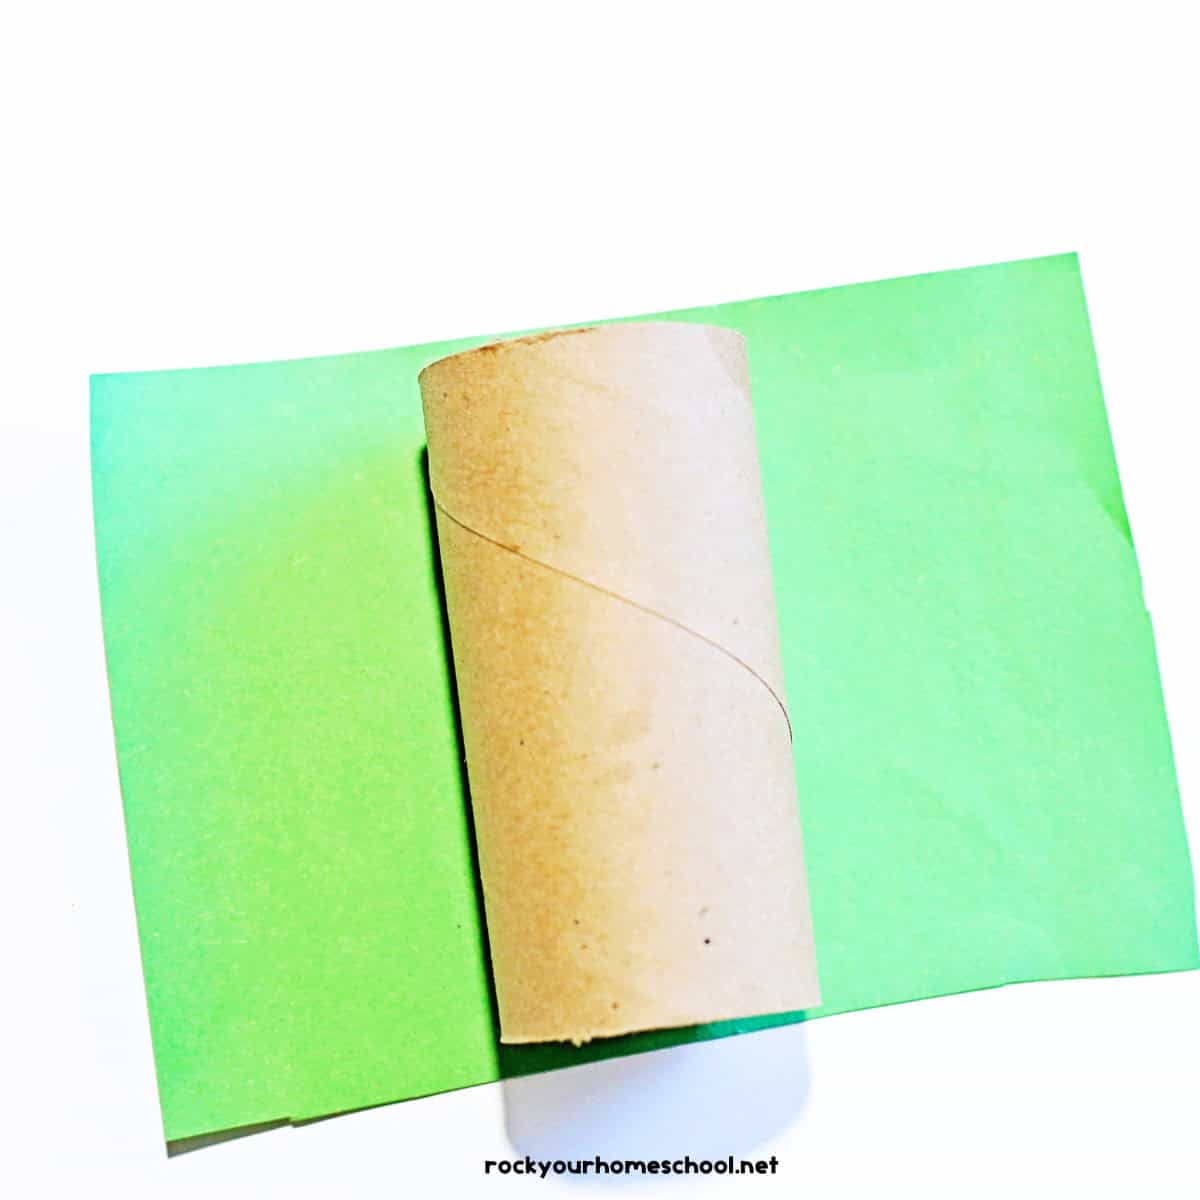
To make the groundhog’s lair, cut a strip of green construction paper about 1 cm longer than the toilet paper roll.
05
Make the grass
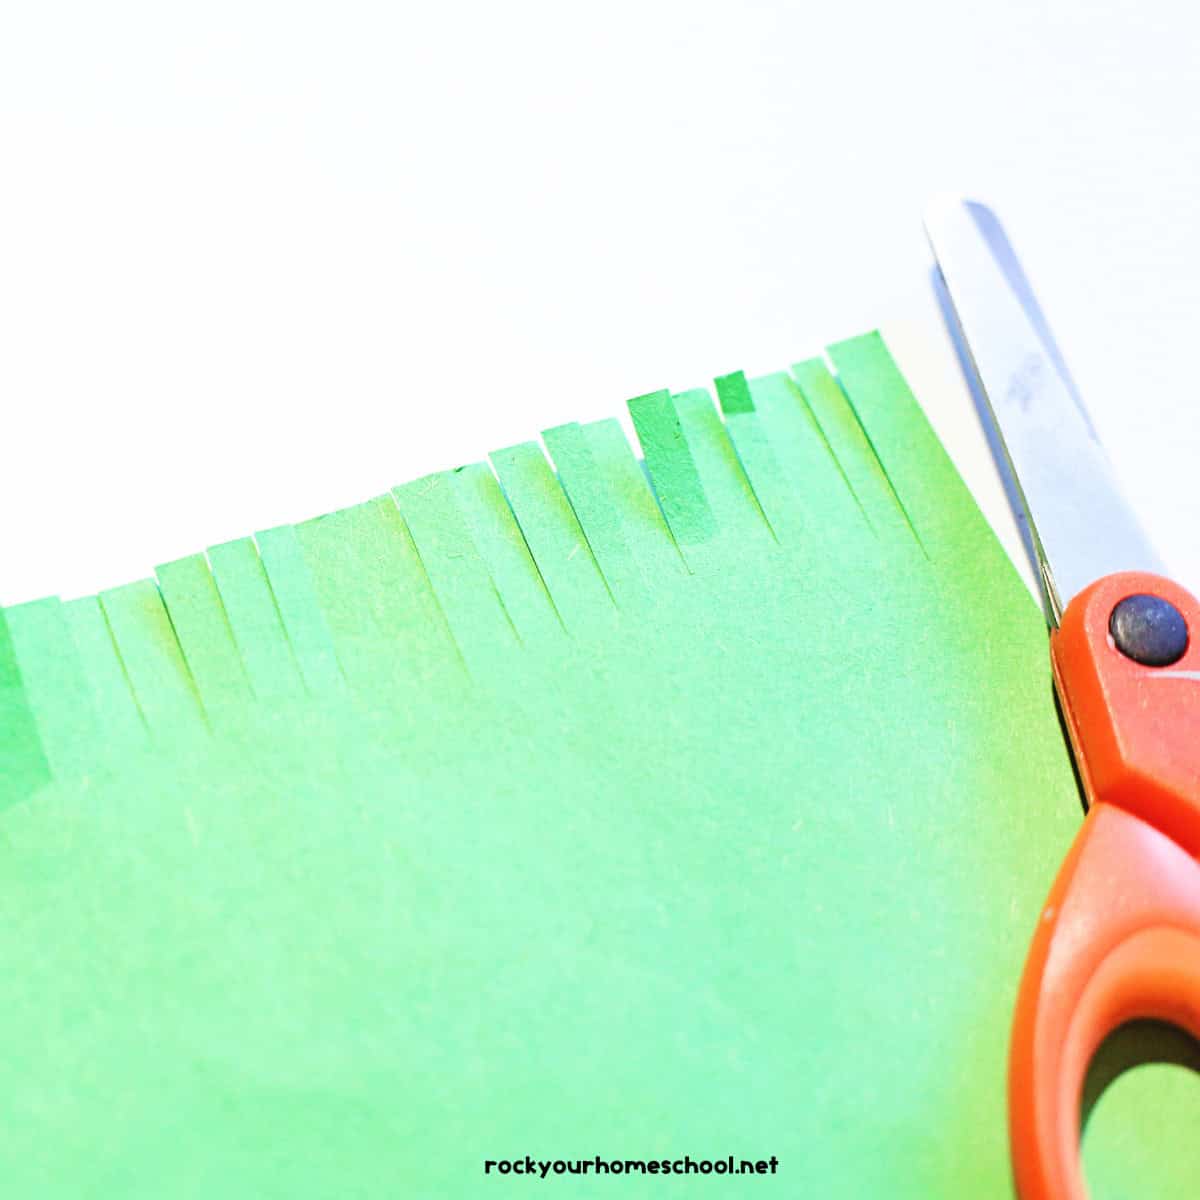
Make minor cuts all the way down one long edge of the green paper. It will look like a fringe.
06
Attach grass
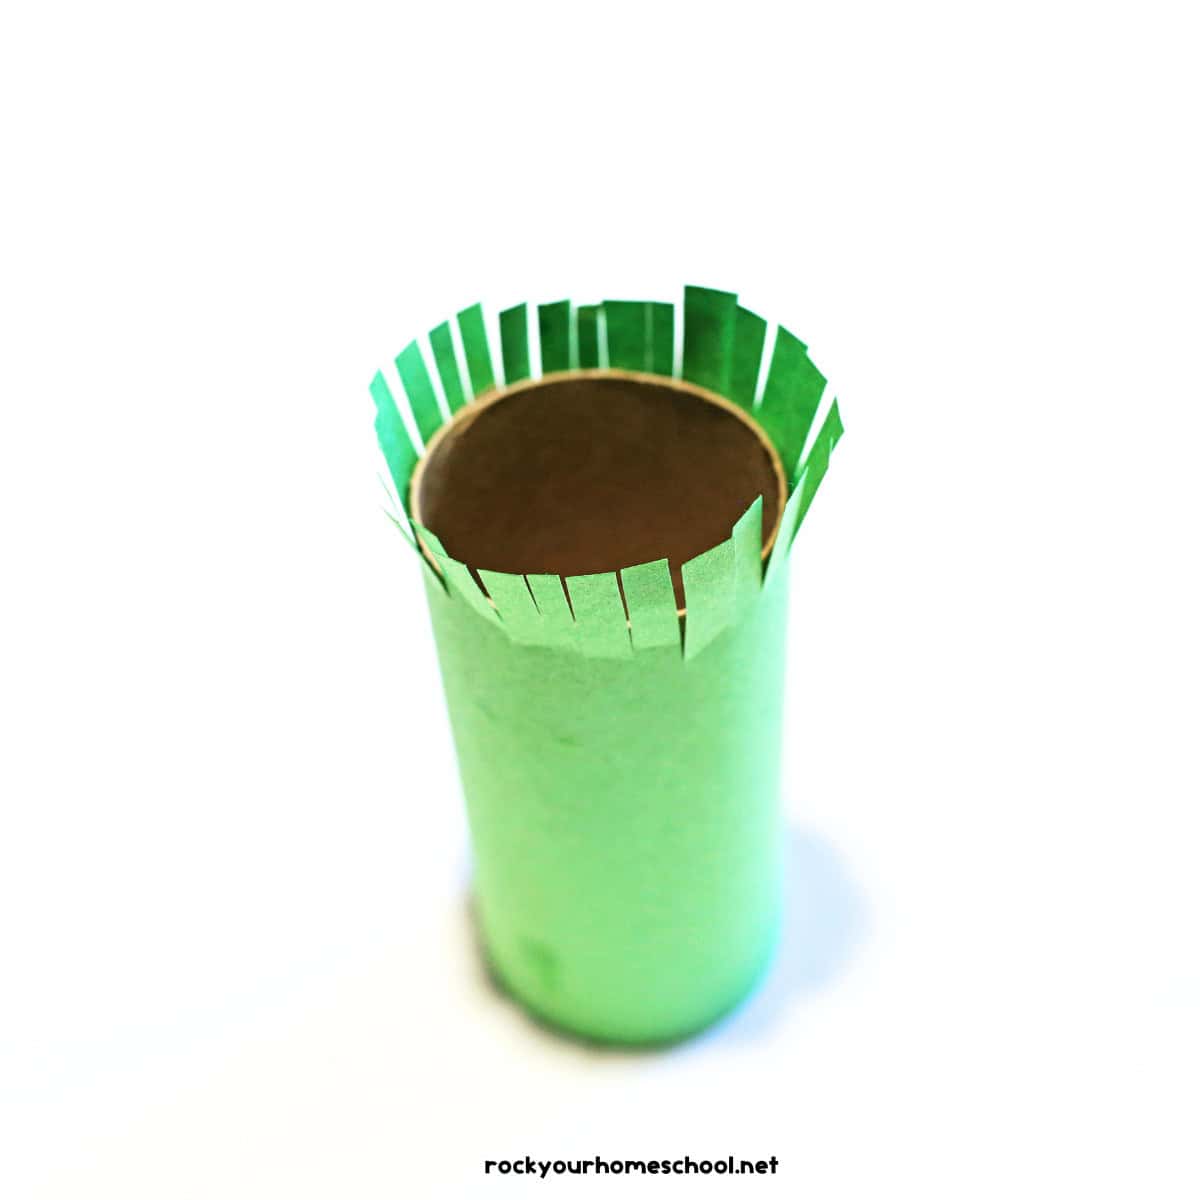
Glue the paper to the toilet paper roll so the uncut edge lines up with the roll’s edge. Continue wrapping and gluing until the paper is fully wrapped around the roll. Allow glue time to dry.

07
Add your groundhog puppet
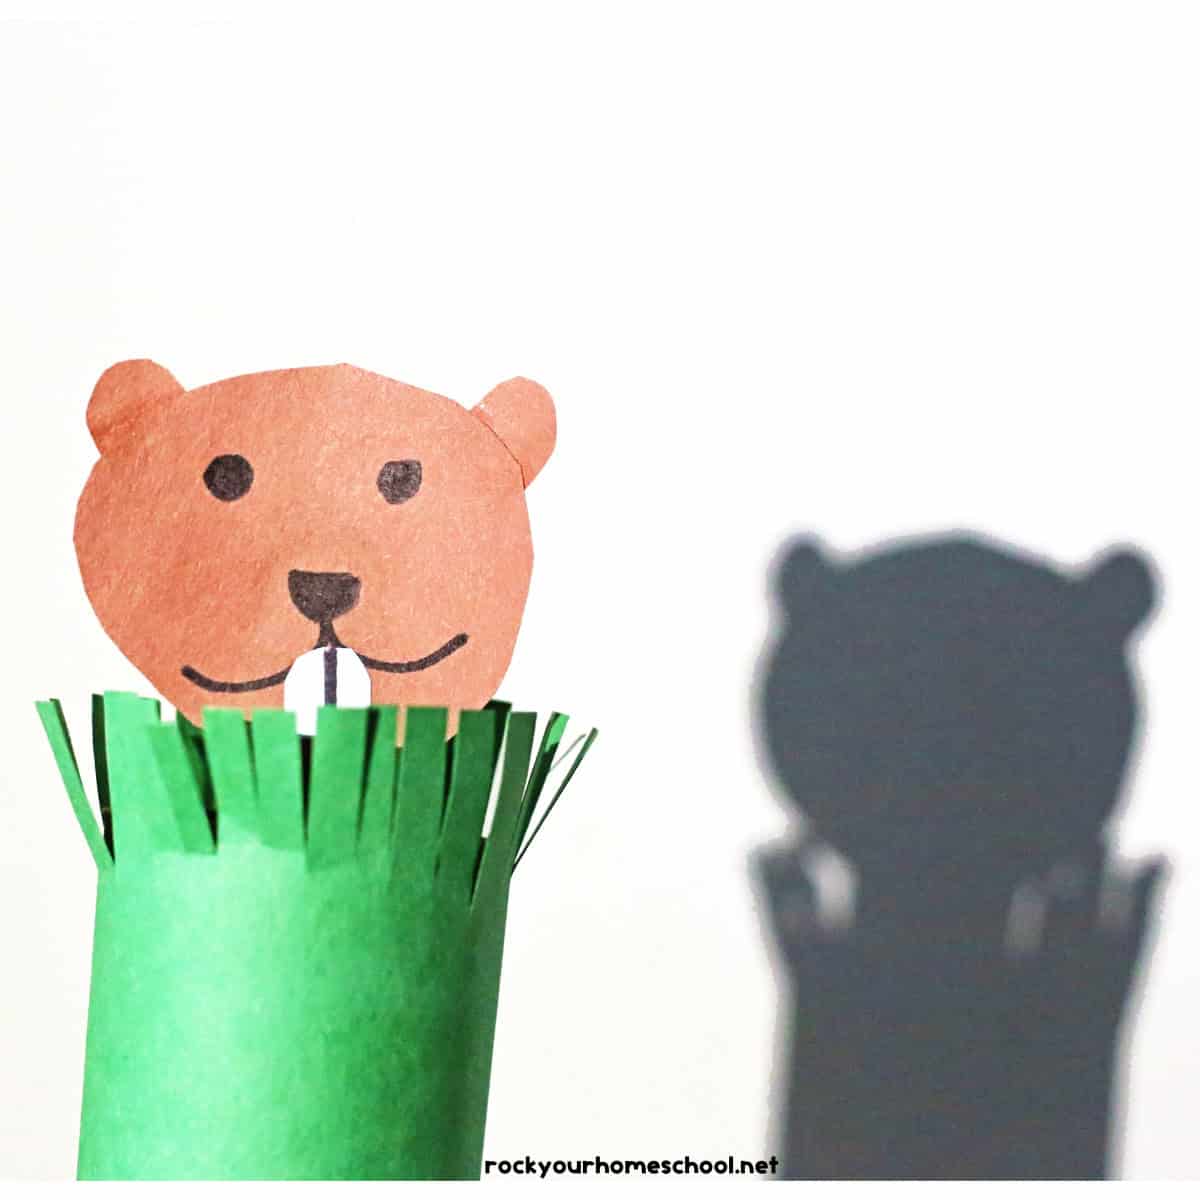
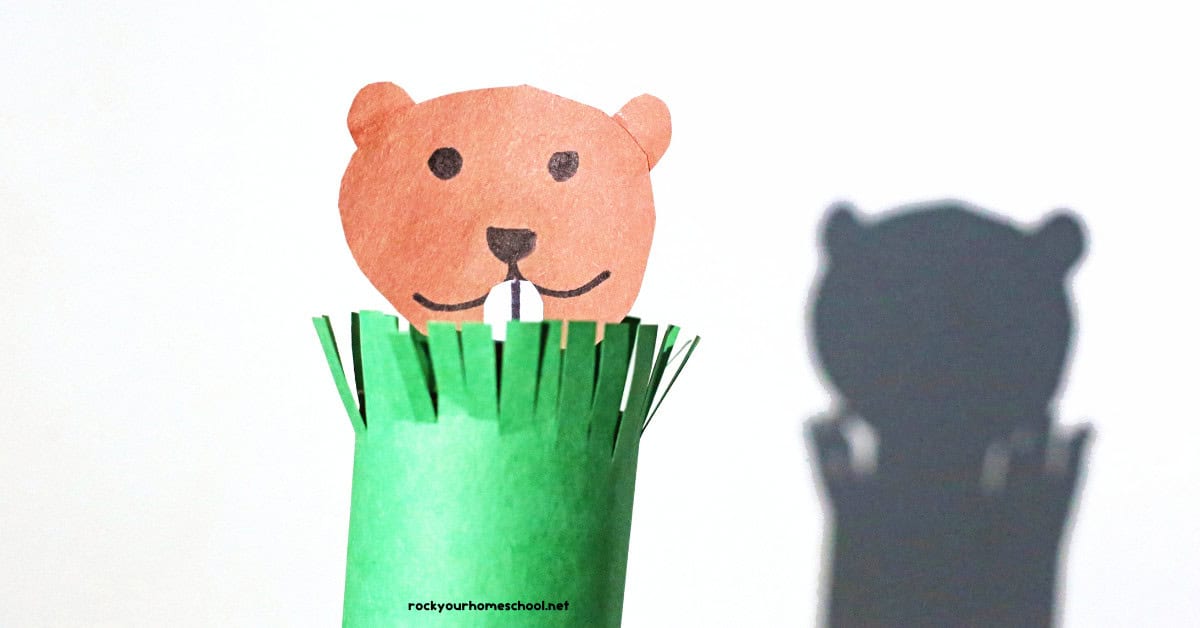
Insert the groundhog puppet into the lair. Use the stick to make the groundhog pop out and see (or not see) his shadow.
Creative Ways to Use This Toilet Paper Roll Craft for Play and Learning
This simple craft for kids is an awesome addition to your Groundhog Day celebration. If you’re teaching your students about this tradition, you may want to do this project a few days before or on the big day.
- Your child can display their groundhog puppet on their desk or make a special box to store it in. What a sweet work buddy!
- Brainstorm different names for your groundhog. You can go with the traditional Phil or try “G” names, like Greta, Grace, Gus, or Gavin.
- Use an overhead light and practice if your groundhog will see its shadow or not.
- For a bit of math fun, move the light to the side. Measure the length of the shadows and compare. This free printable build a groundhog craft is another DIY tool that you can use for this type of activity.
- Oh, and your groundhog puppet can be the star of your writing and drawing! Use your new cute friend as a prompt for creative work.
More Fun and Frugal Groundhog Day Activities
Want to keep your Groundhog Day fun going? Books and little accessories (like stickers) are simple ways to do it.
Groundhog Day! (New & Updated)How to Catch a GroundhogThe Night Before Groundhog DayGroundhogs!: A My Incredible World Picture Book for Children (My Incredible World: Nature and Animal Picture Books for Children)FeelWarm 1000Pcs Happy Groundhog Day Sticker Roll 16 Style Cartoon Dormouse Decals for Kids, Cute Sticker Home Decor Label Crafts for Water Bottle Laptop School Classroom Rewards Gift Party Favor


You can also include free printables, like our Groundhog Day word search activity and color by number pages.
Do you have any questions about making this groundhog puppet? And how will you be using it with your kids? Please let me know in the comments area at the bottom of this post!